

“Smoked” Baby Back Ribs
This guide or cheat sheet is a combination of many hours of hard work smoking various meats, researching and reading “how-to-smoke” via websites, TV programs and the trial and error method.
Good luck — “Blowing Smoke”.
“Grilling, broiling, barbecuing – whatever you want to call it – is an art, not just a matter of building a pyre and throwing on a piece of meat as a sacrifice to the gods of the stomach.”
— James Beard, ‘Beard on Food’ (1974)
Topic: Beef Back Ribs
Shopping BEEF:
My brand of Smoker: Brinkmann “Smoke n’ Grill” (vertical capsule-style). This is a cost-cutter smoker with definite limitations and as a result you will have to work very hard in order to try and produce delicious smoked ribs.
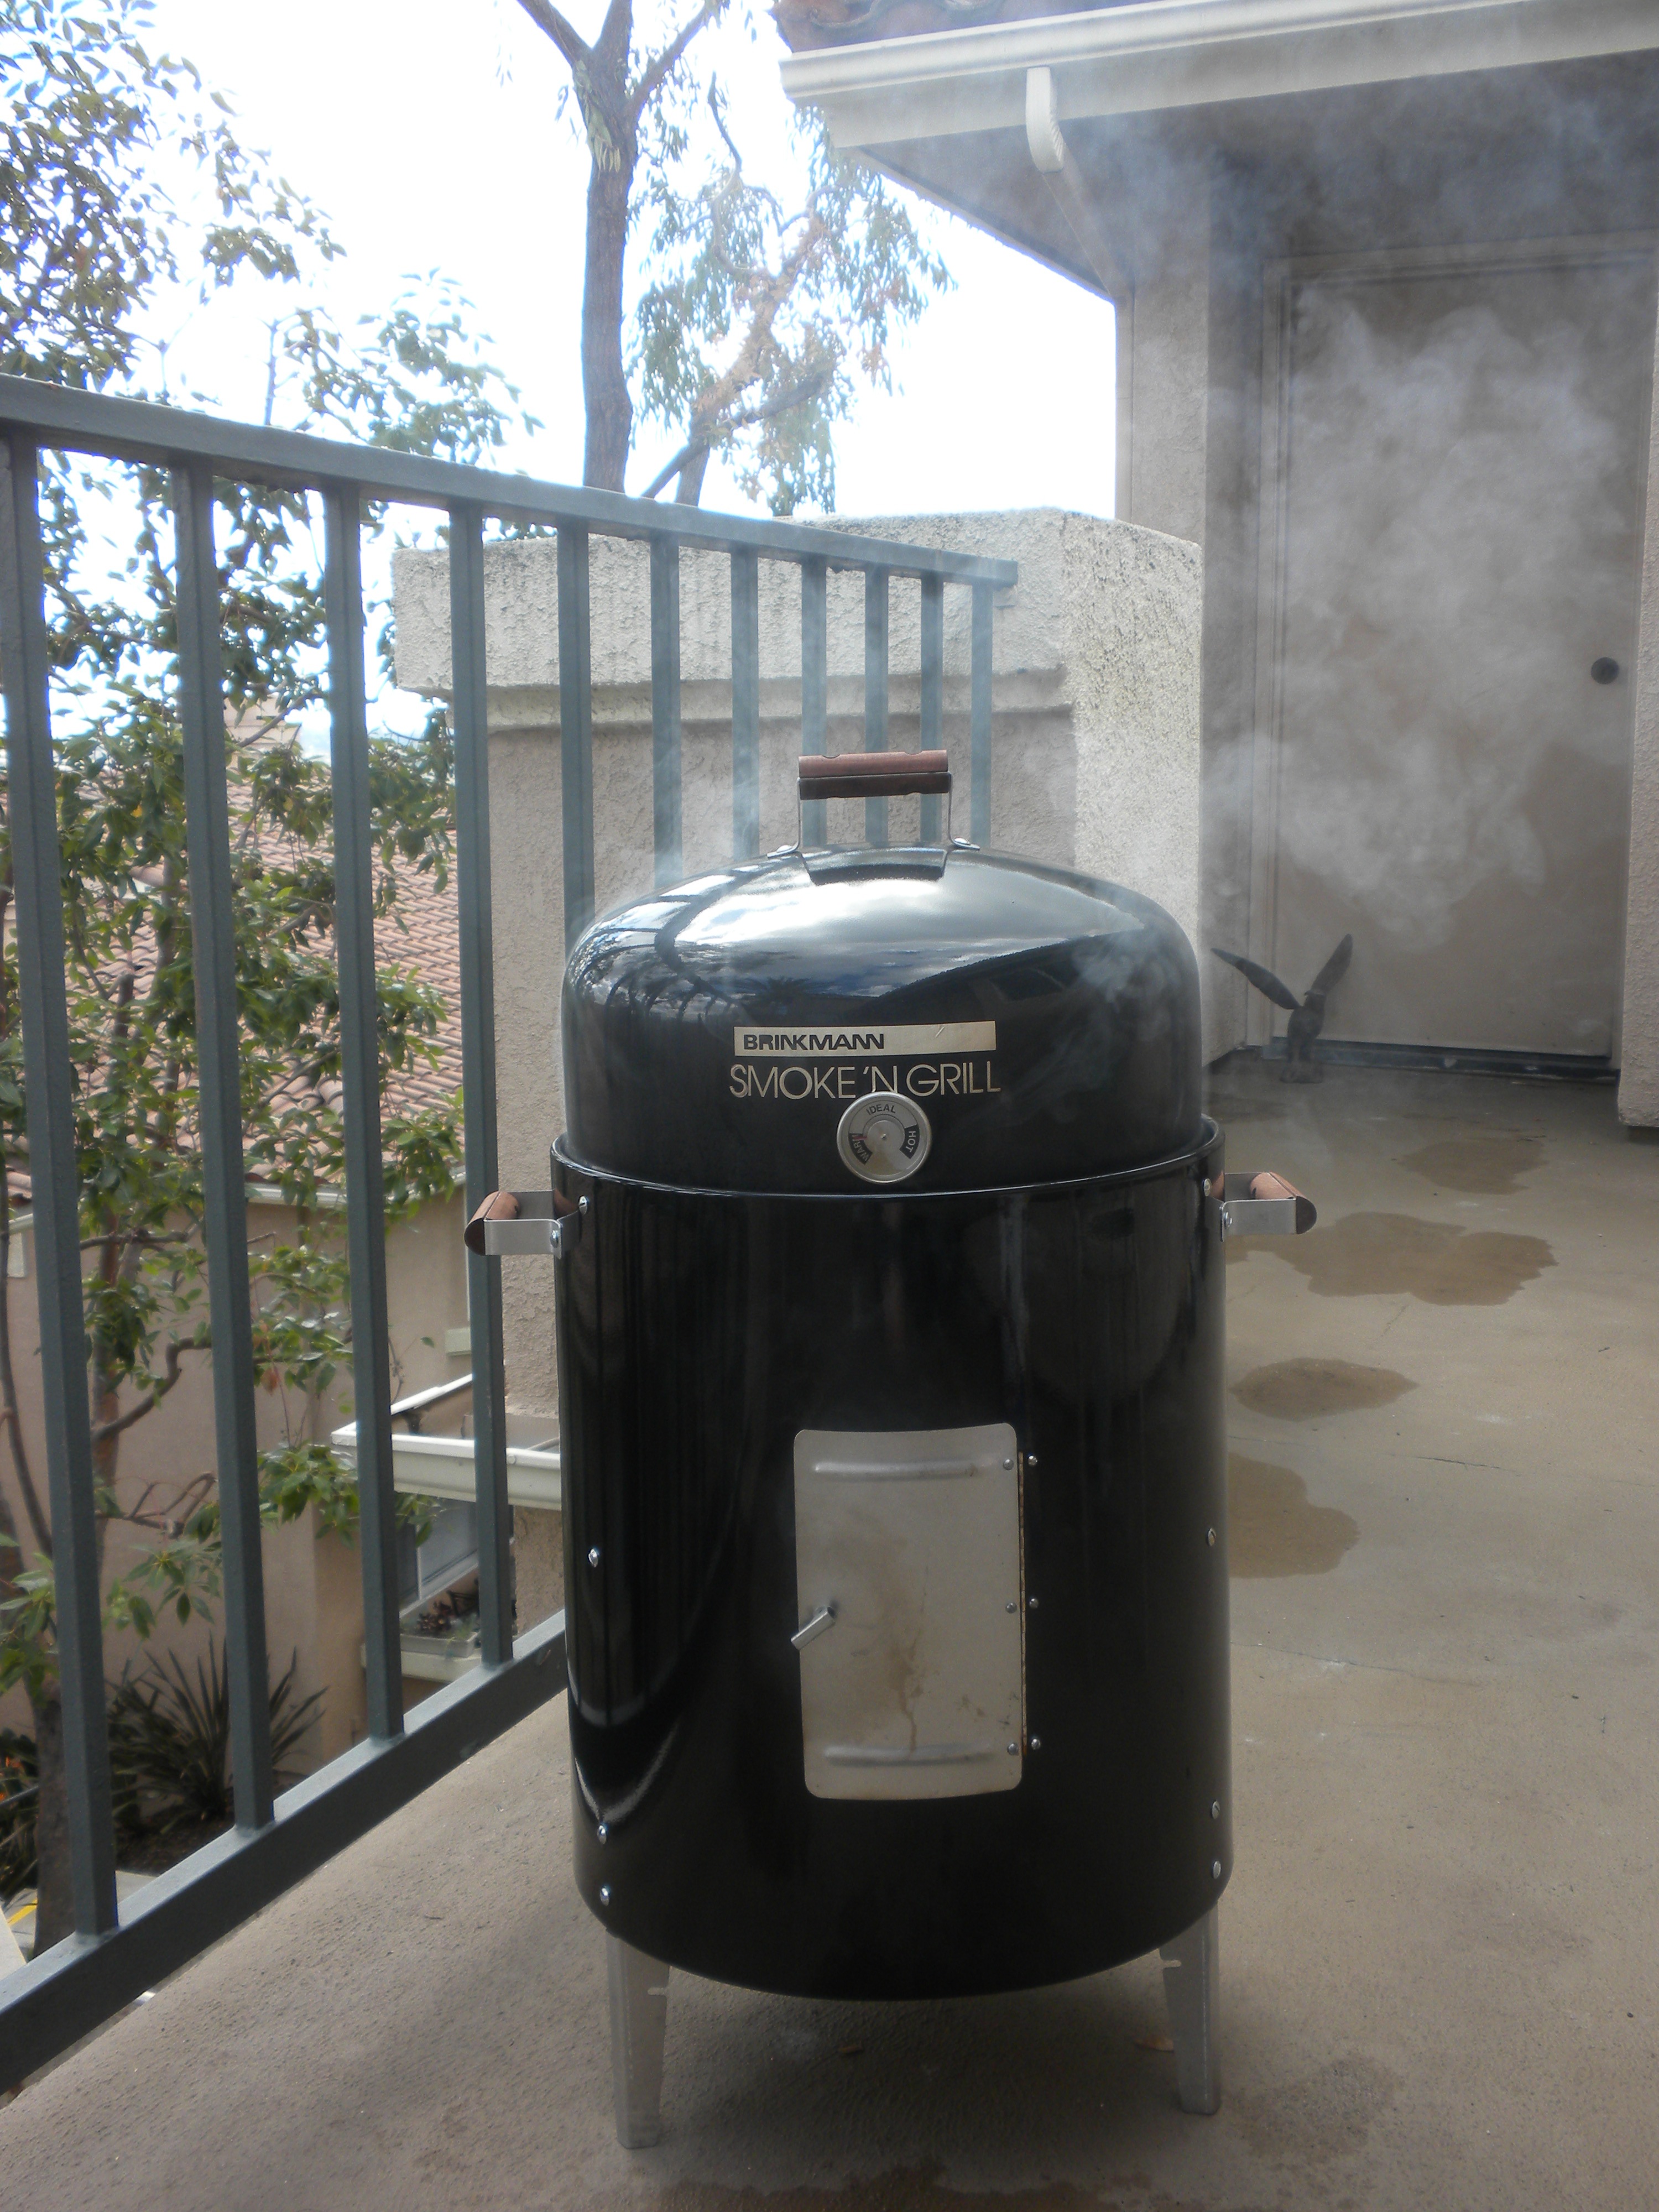
“Nice Smooookkkke”
The main problems are that it is constructed of thin metal and does not have an airtight seal. Thus, the temperature inside will fluctuate as air comes in and out of the smoker. An executive chef whose BBQ class I attended informed me that I was right stating that with a cost-cutter smoker you should smoke your ribs for 2-3 hours. I would hit them with a spray bottle of wet mop (at room temperature) occasionally to insure they don’t dry out during the smoking. Then, sear the ribs by turning the gas grill on HIGH and letting it get going. Place the ribs on for about 1 minute to sear them before turning the heat down to LOW. Stay with the ribs until they are done, checking them with your thermometer periodically. You can wrap them in foil on the grill if you’re concerned with dryness.
I highly recommend using Kingsford Original Charcoal with Kingsford “Odorless” Charcoal Lighter Fluid. Or, use “lump charcoal” which is even better but adds another level of difficulty to the process. The Kingsford Original Charcoal combined with Kingsford Odorless Charcoal Lighter Fluid is undeniably MUCH improved from the nasty chemical taste left on the meat if you were to use “Kingsford Match Light” charcoal. Lump charcoal does supposedly burn hotter than briquettes so bear that in mind. Read more online as there are defenders on both sides of the “charcoal fence” as to which is better.
NOTE: I will warn you in advance that smoking beef is much more difficult than smoking pork. Beef ribs have less fat than pork ribs and the meat tends to dry out much easier than that of pork. Bear this in mind if you are an amateur.
Do your best NOT to buy frozen ribs as beef back ribs are often sold fresh (depending on where you reside). Ideally fresh is best and your local butcher shop is a good bet. Buy the best quality meat you can afford. Costco is not a bad place to shop for meat.
I can fit one (1) whole rack of beef back ribs on each rack. You can always buy “short beef back ribs” if you are concerned as to whether the meat you purchase will fit on an average-sized smoker. Or, you can have the butcher cut it into two (2) half racks. Purchase beef back ribs carefully as often there is a lot of bone and little meat (or more fat than meat). My next purchase will be “vertical rib racks” so I can smoke more meat and allow the heat and smoke to get to the meat better.
NOTE: Have the butcher remove the “tough” membrane for you. Otherwise you will be pulling your hair out while stabbing yourself with a dull butter knife or screwdriver. It must be removed or it will inhibit the smoke and spice from reaching the meat.
If your smoker doesn’t have a built-in thermometer which displays numbers you will soon feel as if — “you were screwed at the drive-thru”. You can set a Taylor oven thermometer directly on the racks but with how many times you will need to check it you will lose way too much precious heat and your finished product will suffer BIG TIME.
Buy a digital meat thermometer (or any probe meat thermometer) for checking the internal temperature of the meat for doneness. Buy the best spices you can afford, avoid old spices or $1.00 cost-cutter spices. Vinegar, orange or lemon juice and Coca-Cola are good options for marinades which will tenderize the meat. Most pros agree that beef ribs should not be sweet so choose your dry rub ingredients carefully.
Pick your wood chips (see chart at bottom of article). OAK and MESQUITE are good choices with beef or you can use a combination of woods. Different species of trees have different ratios of components and do impart a different flavor to food. HICKORY is another option for smoking beef. Mesquite and Hickory have strong scents and if used in excess can overpower the meat and make it taste bitter.
For example, I used 2 ½ cups of Jack Daniels oak chips and ¾ cup of “Real Flavor” hickory chips and ¾ cup of “Frontier” mesquite chips and my meat actually lacked smoke flavor and wasn’t bitter. Thus, I recommend experimenting and finding out what works for you based on your desired level of smokiness.
Try using white wine or beer (good with beef) instead of water in the water pan. Also, you might soak your wood chips in your liquid of choice. Use cheap wine, good wine doesn’t taste better and may taste worse. The same applies to beer but make sure not to buy a watered down “light” beer. Buy 4 or 5 bottles of $2.00 Charles Shaw white wine at Trader Joe’s or a cheap box of white wine. Buy a 12 pack of real beer.
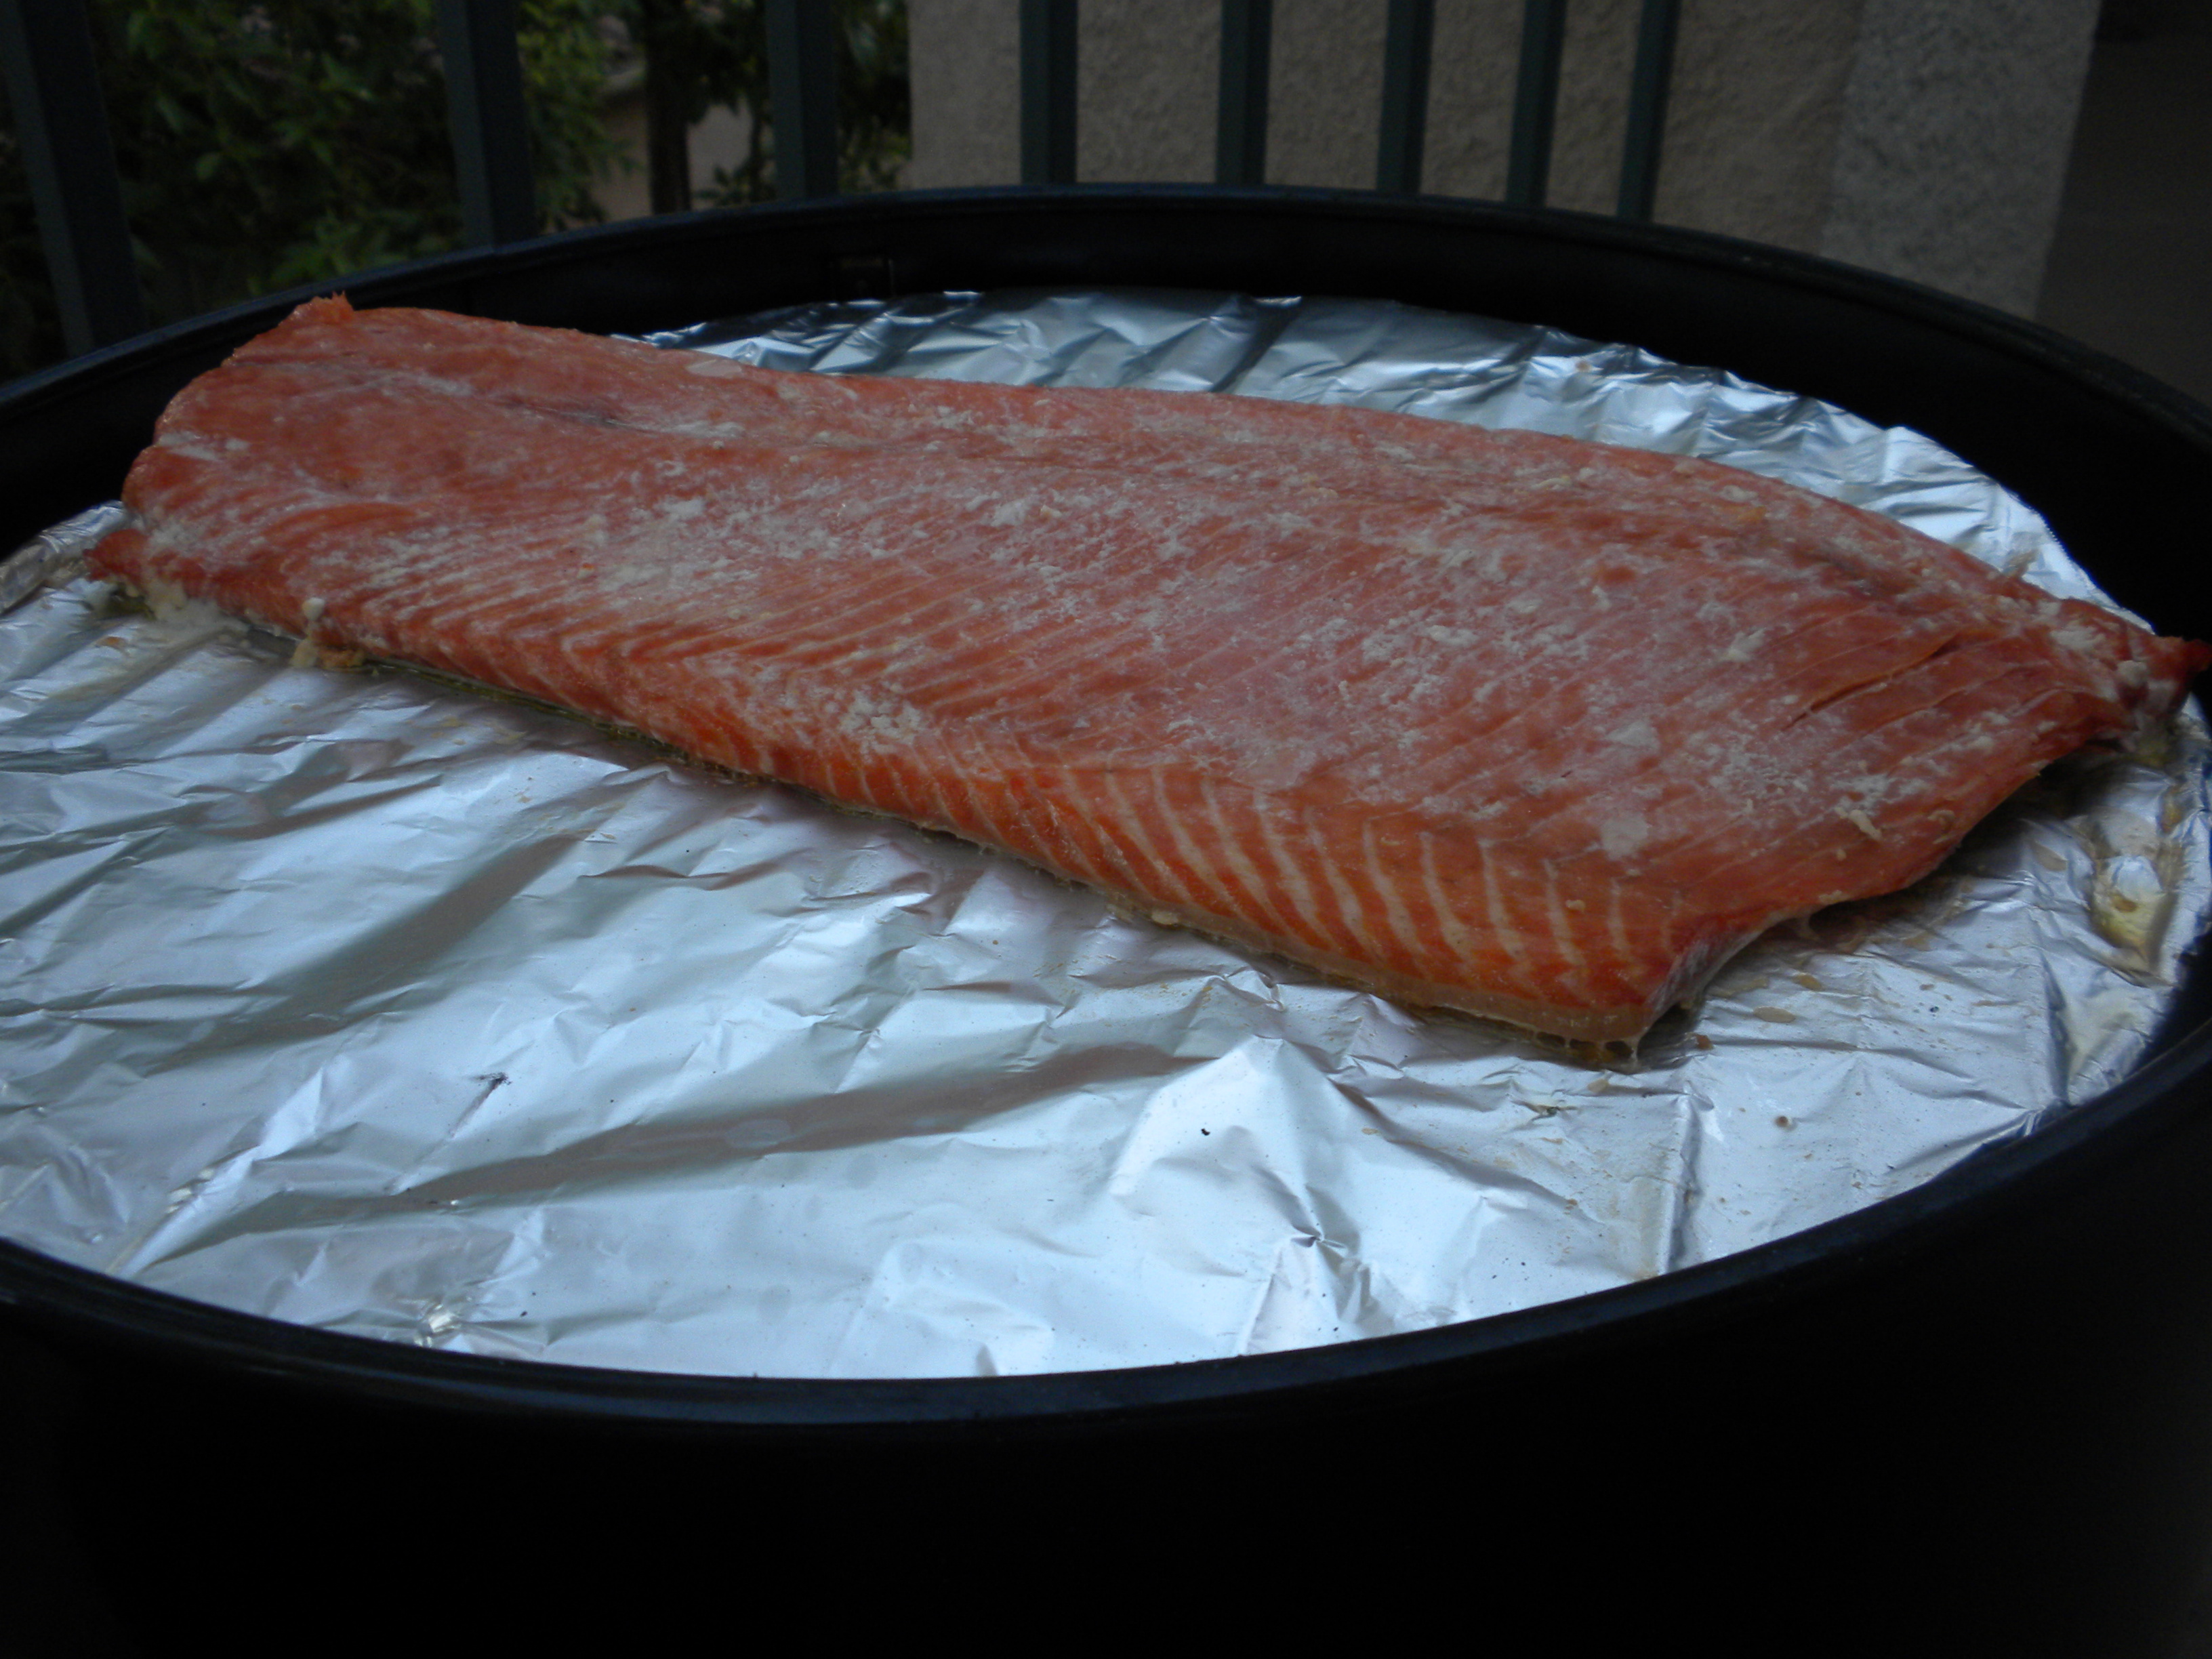
My First Attempt @ Smoked Salmon
Prepping BEEF:
Soak 3-5 cups of wood chips for about one hour. Drain them and place them directly on the coals when the smoker has reached temperature. Too much smoke = bitterness! I add wood chips 4-6 times throughout the smoking process.
If there is a lot of excess fat, remove “some” of it now.
Prep should take about 1 hour including allowing the meat to get to room temperature. This will help shorten the “on the grill” time.
Rinse the meat with water and pat it dry with a paper towel.
NOTE: For the BOTTOM rack you need to have the meat resting on foil and on top of a cutting board. To re-insert the bottom rack you have to circumnavigate the side brackets. As a result, your only option is to set the meat on the rack only after you have re-inserted it on top of the brackets. Again, it is crucial that precious heat isn’t lost getting the “meat on the heat”.
Given that beef can get dry you may want to marinate the meat overnight. Also, you want to be sure there is some “acid” (ex. Lemon juice) in there to tenderize the meat. You may want to use a spray bottle of whatever you use so you can quickly spray down the meat without losing a lot of heat inside your smoker.
About.com has a variety of rib rub recipes. I used one called “Beef Rib Marinade” and it smelled amazing prior but once it cooked it was too sweet for our palate. It included the following ingredients: white vinegar; grape seed oil or avocado oil; honey; crushed garlic; cayenne; black pepper. The three tablespoons of honey were just too much unless you’re a sweet BBQ sauce rib lover.
If you use sea salt in your rub be sure it is a bottle with a hand grinder built in since you want it “finely” ground.
If you use a wet rub (marinade) you will want to utilize a “turkey size” Reynolds oven bag (plastic) for marinating a full rack of ribs overnight. Drop the rack of ribs in the bag and then pour the wet rub (marinade) all over the ribs. Use the plastic cinch tie and then (while keeping the cinch tie upright) roll the meat around in the marinade for several minutes. NOTE: A strong smelling rub will very likely escape from your fridge in the middle of the night and smack you in the nose while it marinates overnight. If you want to avoid this you’ll need to find a giant-sized airtight plastic container.
If you have the time, marinate the meat in the fridge for up to 24 hours but no more than that.
NOTE: Most pros will tell you NOT to use a wet rub on beef. I still haven’t produced a great beef rib but the closest I came to achieving it was when I marinated the beef ribs the night before. If I don’t give up on beef ribs completely I will likely utilize a spray bottle on my next attempt. One of my friends has a $3000 commercial smoker and even he struggles with keeping beef ribs or beef brisket moist.
If you opt for a “dry rub”, place the ribs on foil on top of a cutting board prior to seasoning. NOTE: If you utilize a dry rub you will need to spray Coca-Cola or something similar several times throughout the smoking process to help keep the meat moist and tender.
For a “dry rub” (sauce free) I use Emeril’s “essence” rub + sea salt + brown sugar. A good start (depends on tastes) might be ¼ cup of Emeril’s rub, 1/8 cup of sea salt, ¼ cup of brown sugar.
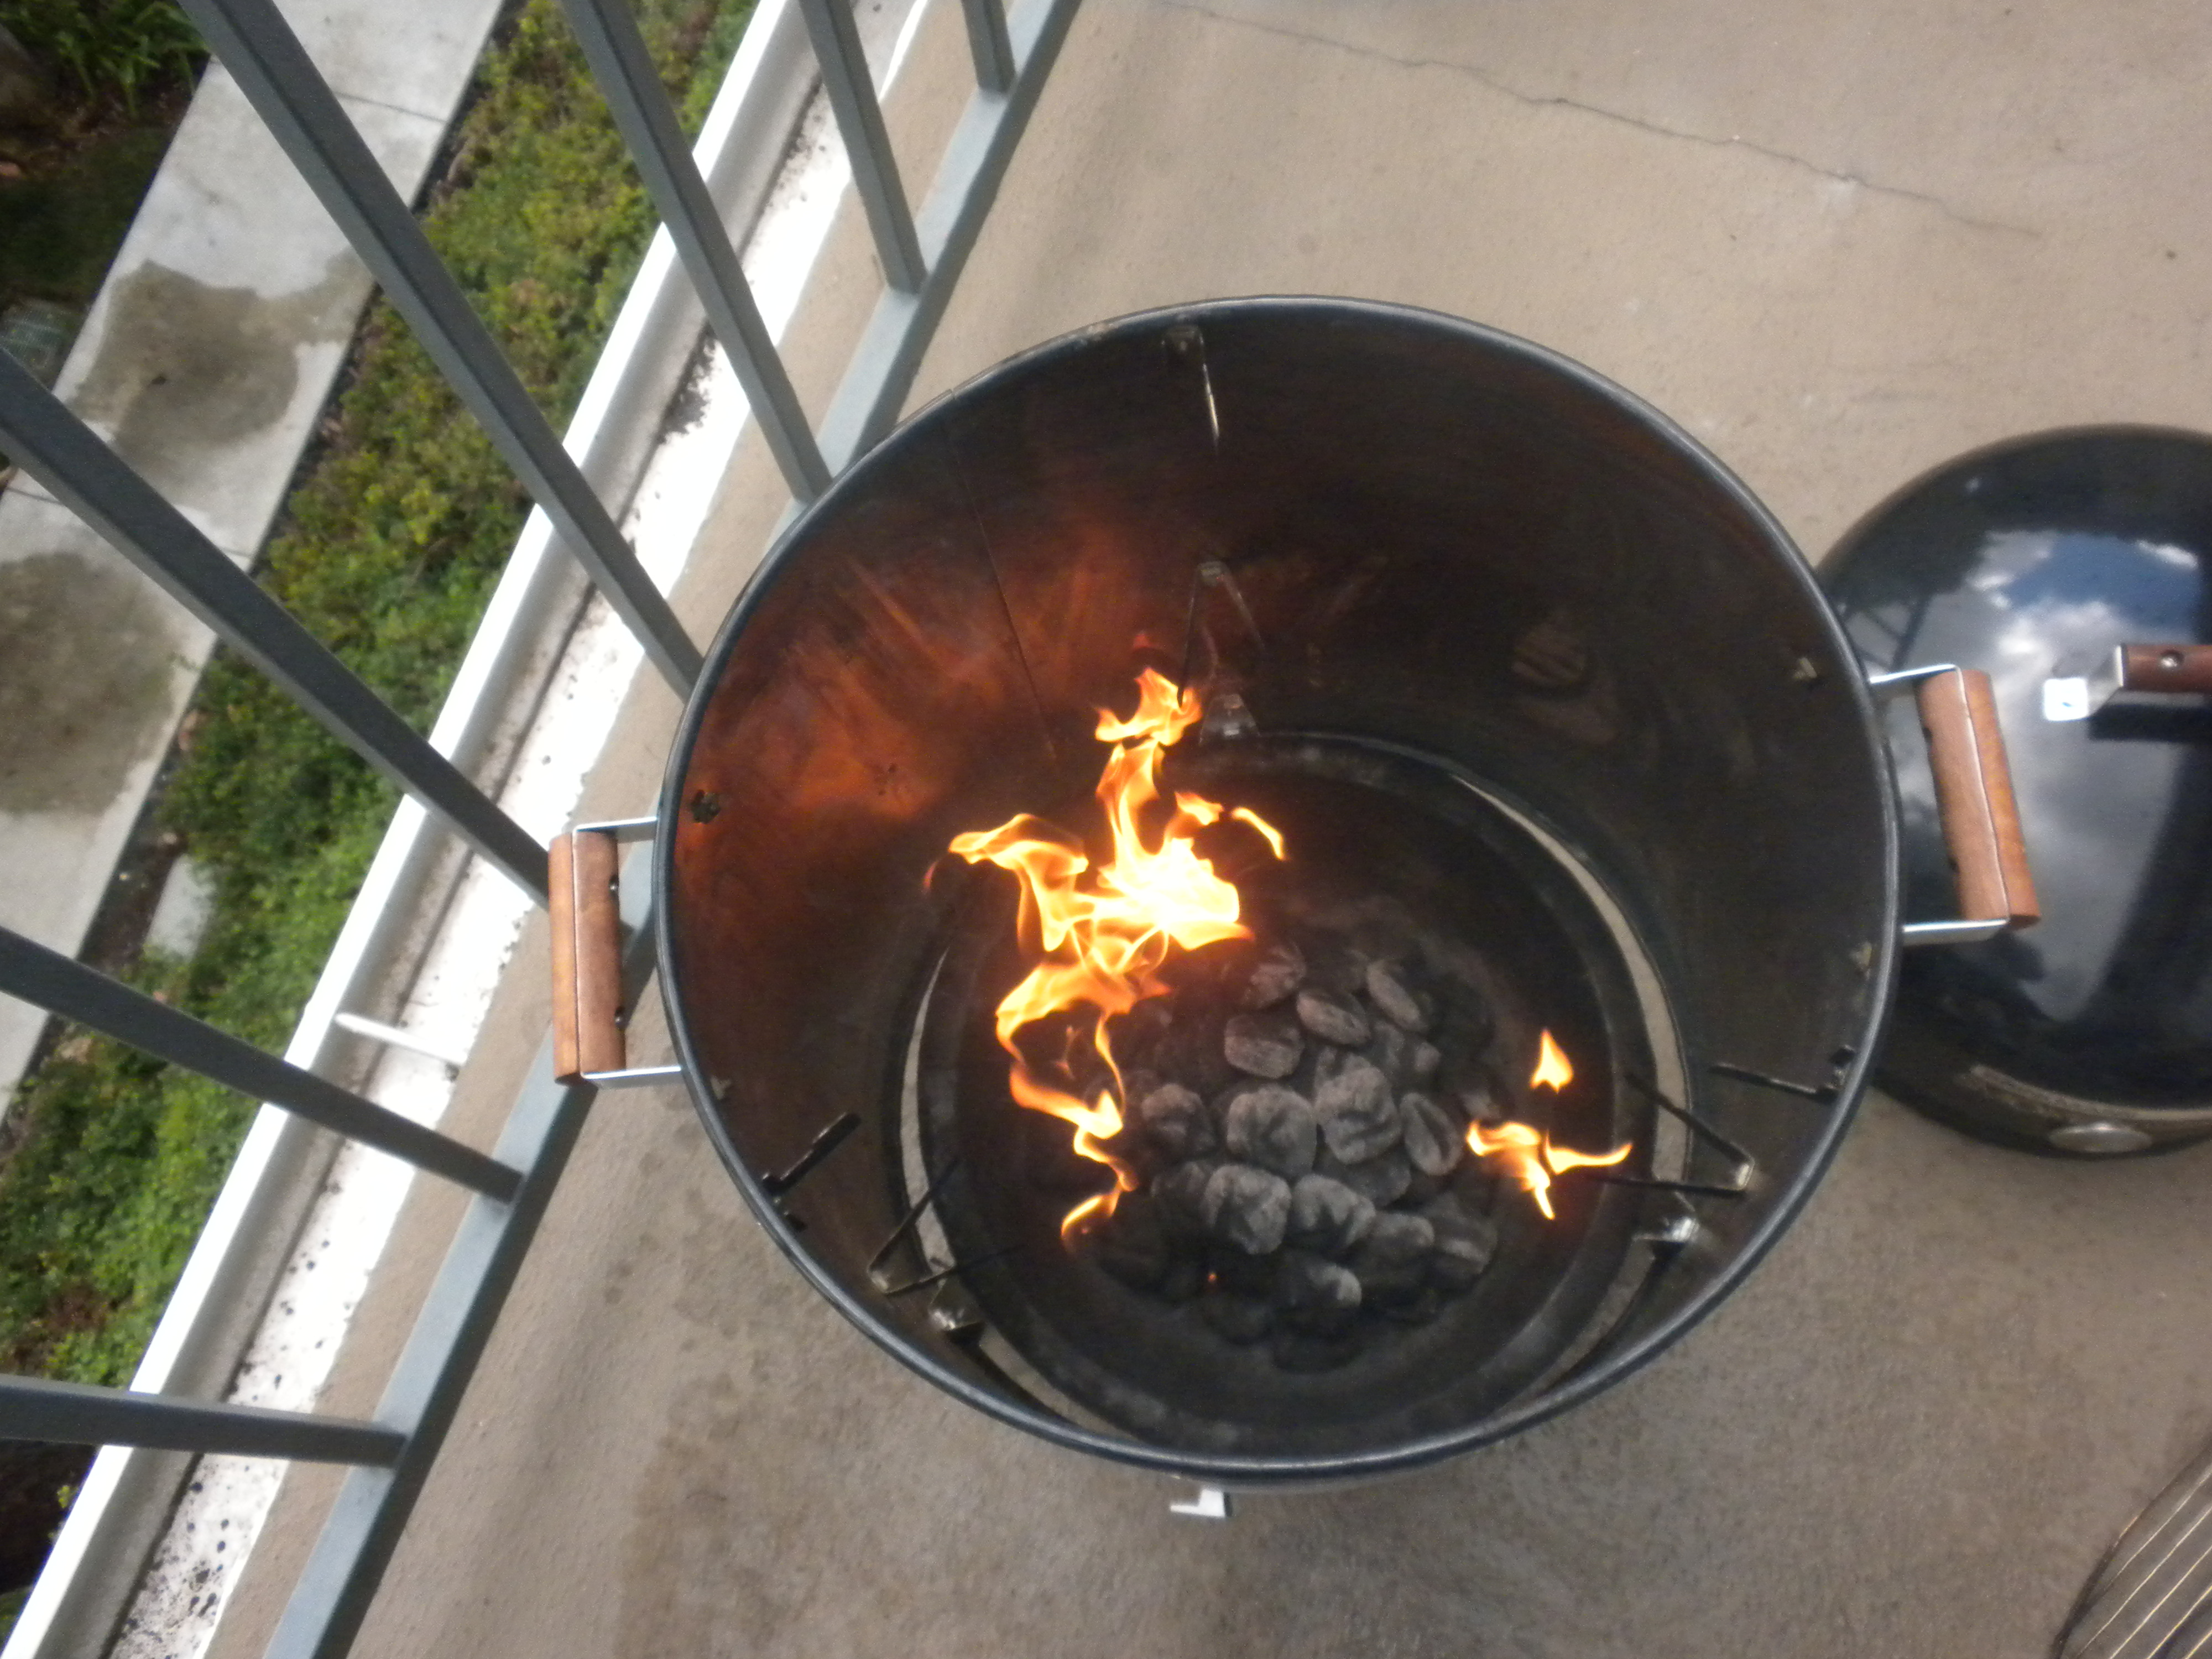
Smoker, Flaming coals
Another nice rub is “Simmie J’s Hickory Flavor Gourmet Seasoning and Rub” but it is low on salt so near the end of the smoking process you will need to sprinkle sea salt lightly on both sides of the ribs.
NOTE: If you use SALT in your rubs you will need to go easy on it as salt will dry out your meat. Even better would be to choose rubs without salt and then sprinkle sea salt on your meat towards the END of the smoking process.
Gently rub in the rub and don’t over-season as a light to moderate application is sufficient. Be sure to get the rub on both sides of the meat.
NOTE: If you have a vertical capsule smoker like mine, ensure that the water pan (diameter approximately 13.5”) is ABOVE the charcoal pan (diameter approximately 15.5”) or you will block the heat from rising to the meat on the top rack.
Smoking BEEF:
NOTE: The most difficult part of smoking is “achieving and maintaining” heat. The second most difficult part is achieving consistent doneness throughout the entire rib.
Ideally you want to smoke when the weather is on the cooler side since there will be more humidity and thus more moisture is brought to the meat.
My smoker is the Brinkmann “Smoke N’ Grill” (capsule-style) which has a thermometer with a Low, IDEAL and High readout on it. I tried to get it as close to ideal and maintain it as best as I could. Maintaining heat is one of the biggest challenges to “smoking” and that is especially true when utilizing “cost-cutter smokers”. You may need to visit smoking-meat.com for their article “Problems with the ECB and How to fix them” which will assist you in modifying your cost-cutter smoker. I drilled holes into my charcoal pan and inserted a REAL (with numbers) temperature gauge so I could more accurately monitor the cooking temperature.
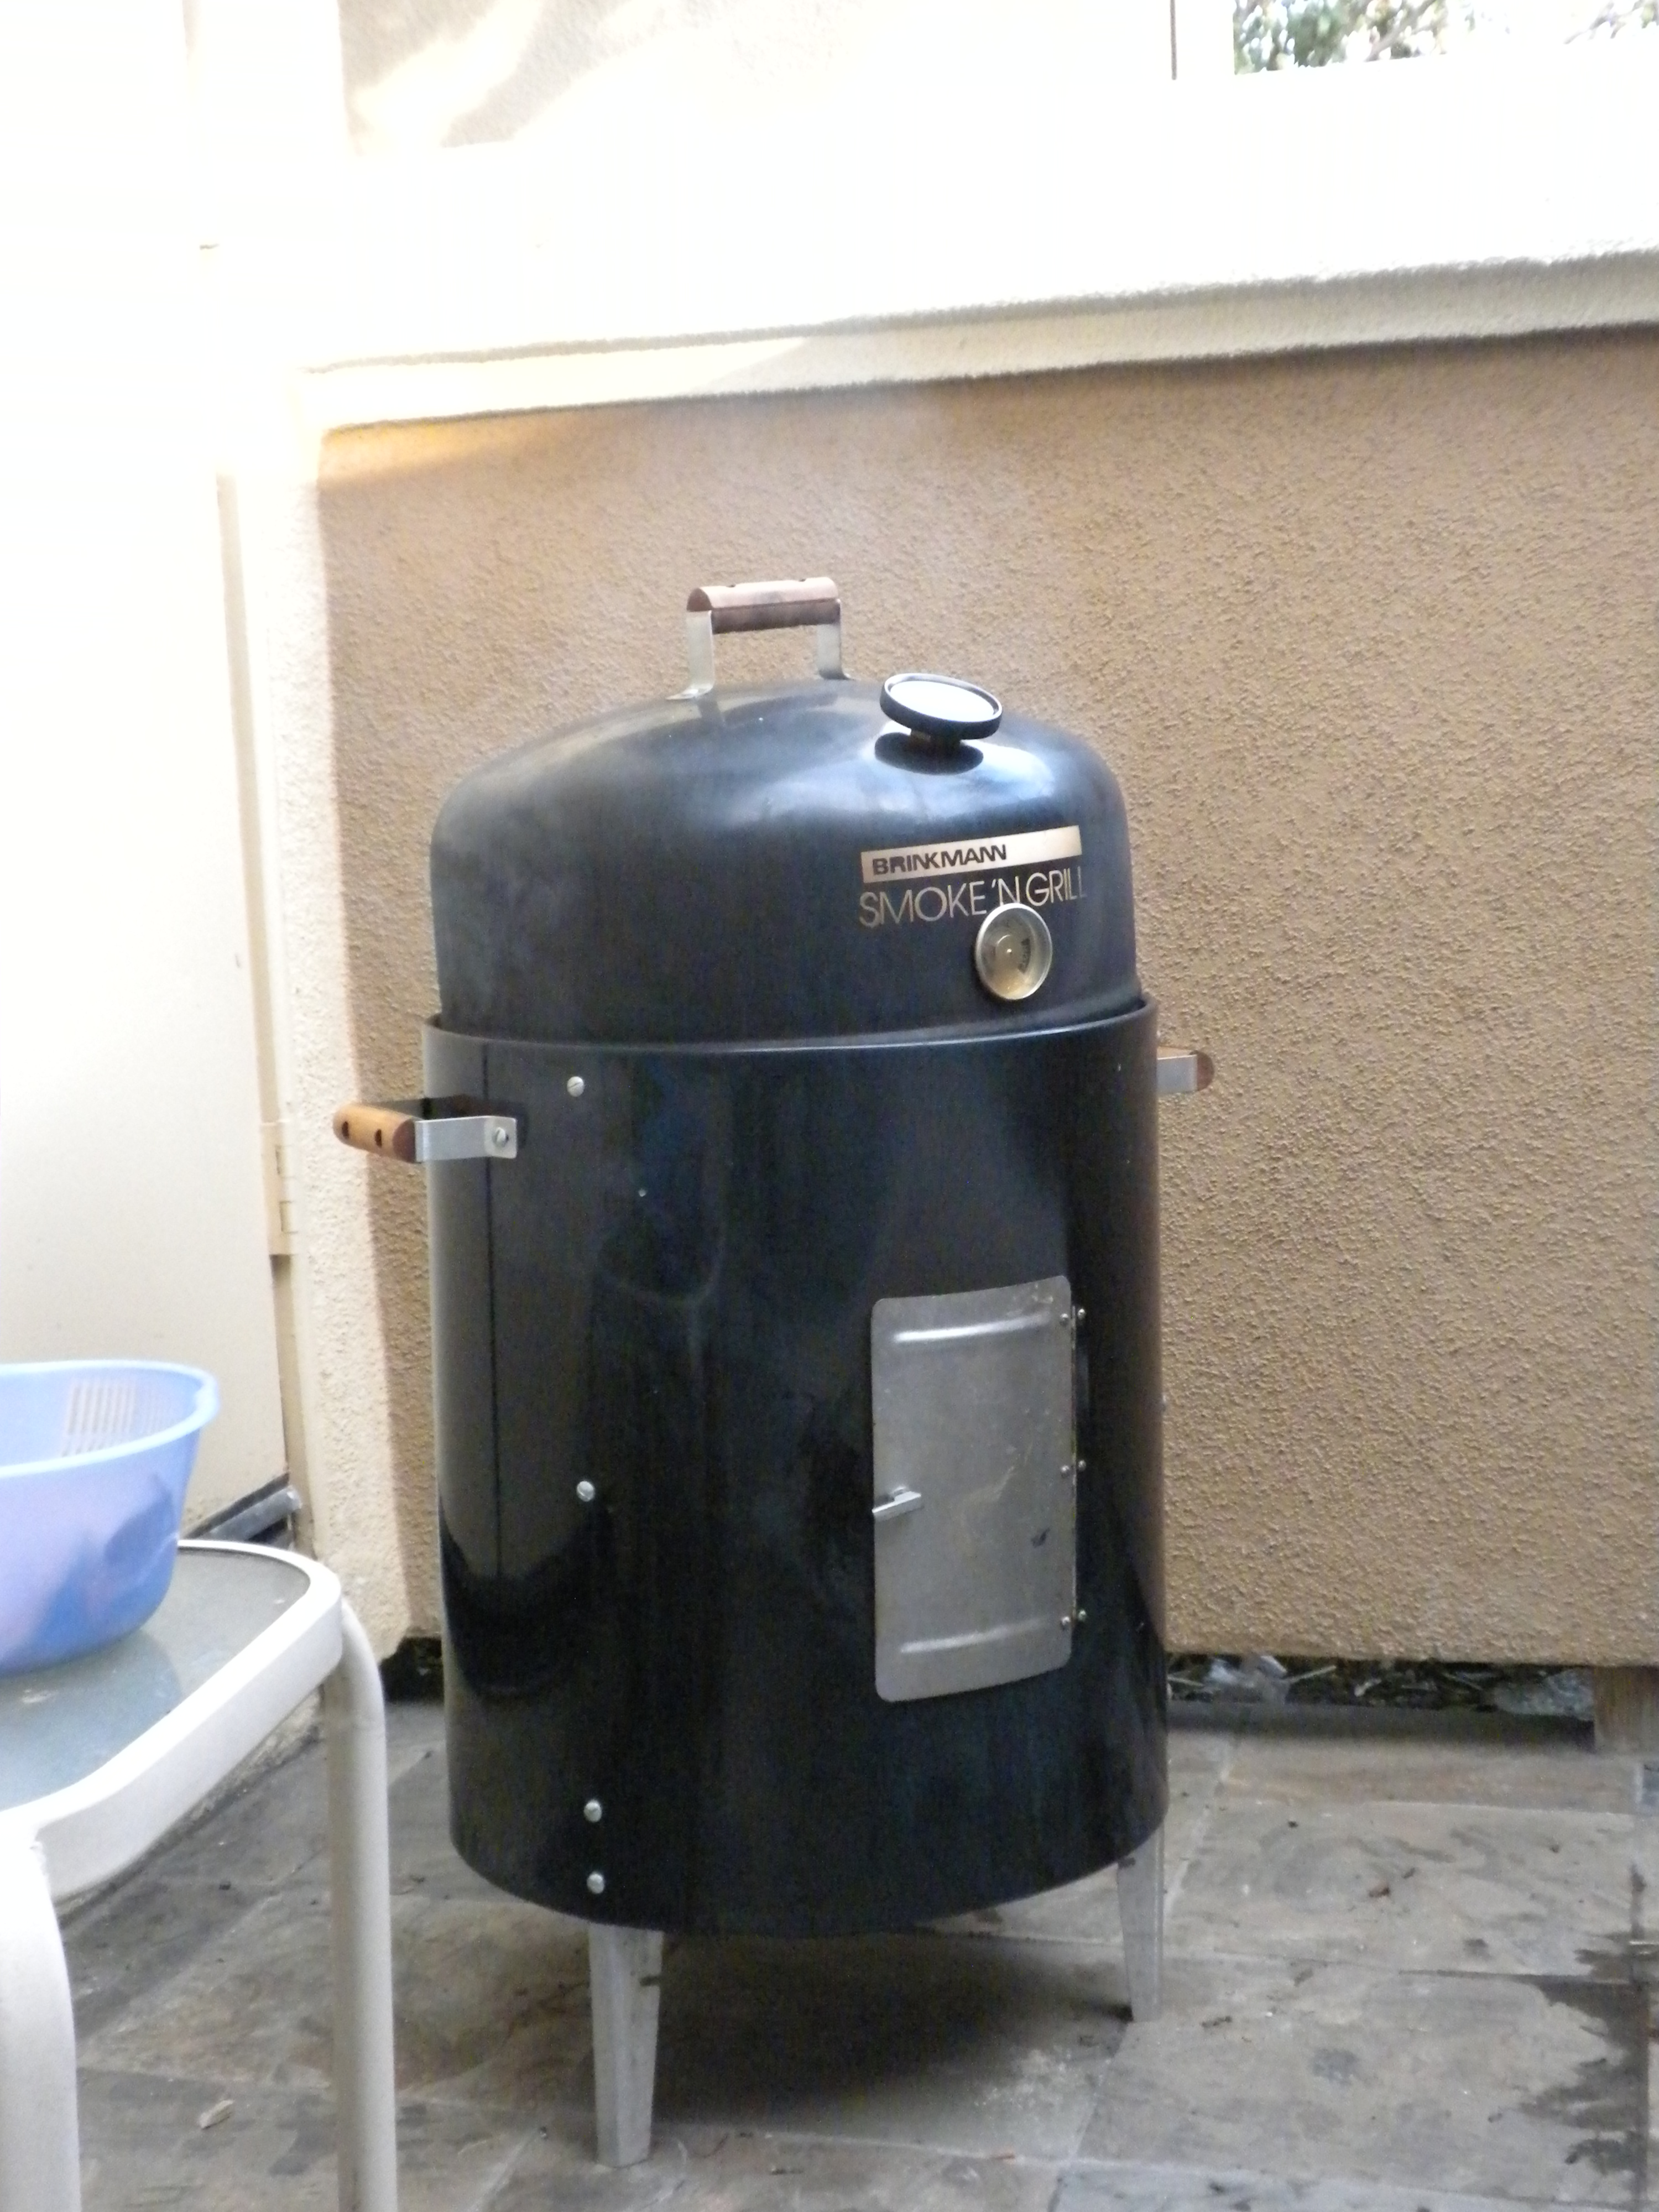
“Modified” Brinkmann Smoker
“Hot smoking” occurs within a temp range of 165 F – 185 F. If it gets hotter than 225 F the meat will shrink excessively, buckle or split. Moisture & fat will be “cooked away”.
Build a very large pyramid of coals (covering the bottom) in the pan at the bottom of the smoker. Try NOT to block the air holes (if you drilled them in the outer edges of the bottom of your charcoal pan).
1 ounce of lighter fluid per pound of charcoal is recommended but my experience is it takes noticeably more fluid than that. Spray it liberally on the coals, light and wait for them to take on more of a gray hue. I’m sure “over saucing” the coals leads to them turning to powder soon than later but it is necessary in order to build a good fire. You can always add more coals as you go and trust me — you will. Don’t pack the briquettes too tightly. Remember air must be able to circulate between them.
Have a bright flashlight (ex. Maglite) handy for peering in at the meat on the lower rack and checking the level of liquid in the water pan. NEVER let the liquid run out and use warm or hot liquid whenever possible. You don’t want to waste your heat warming up something you can’t eat.
Use a squeezable “sports” water bottle with nozzle (ex. Arrowhead) so you can spray liquid into the water pan at an awkward angle during the smoking process.
If you want to try using this smoker EXCLUSIVELY, begin by placing the ribs bone side down on the racks. Here we will employ the “3-2-1 plan”. Smoke your ribs for 3 hours with the bone-side DOWN. The next 2 hours you’ll smoke the ribs wrapped in foil. The final hour you will smoke the ribs bone-side UP. Take the opportunity to rotate the ribs (i.e. placement on the rack) on each of these changes to help insure even cooking. I still have issues in regards to meats cooking evenly. I believe it is because the water pan is in the way and while it helps keep your meat moist it also blocks off some of the heat.
Anticipate that the actual cooking process will take a bare minimum of 6 hours to cook but up to 8 hours or more if you “screw the pooch” and fail to achieve and maintain heat.
Check the temperature at 20 minutes to insure you’ve “achieved heat” and not again until 1-2 hours later.
Add more coals as needed throughout the smoking process in order to maintain heat. About every 1-1.5 hours I found myself adding 7-8 pieces of coal. This will help you elevate or maintain the heat but NEVER add lighter fluid and a match during the smoking process. Unless you want to flambé the meat on the lower rack.
NOTE: Never allow the water pan to run low or run out of water or you will lose moisture. Again, use room temperature or above liquids when possible to avoid wasting fuel. Use the sports water bottle with nozzle for occasional refills to the water pan.
NOTE: The “danger zone” is the temperature range between 40 F – 140F. When uncured meat remains in this zone for more than 2 hours the growth of bacteria increases to a dangerous level. Also, smoking meat robs the environment of oxygen which when combined with the “danger zone” increases odds of botulism.
Add wood chips to the coals prior to placing the meat on the rack. Also, you may add them periodically throughout the process. However, don’t go overboard or the meat might get bitter and nasty and you’ll lose heat by constantly opening the barn door. Never use walnut wood chips. A friend of mine used this wood and the meat was bitter and unpleasant tasting.
Use long tongs for moving the meat (if you have to) but you really should move them as little as possible during the smoking process. The more you move the meat the more juices that may be lost.
Open the “barn door” on the side of your smoker as little as possible or precious heat will be lost.
NOTE: If you have a cost-cutter smoker like mine you may need to use the “barn door” to bring down the temperature if your temperature gets too high. I recommend not going overboard and leaving it open for too long or the temperature may plummet too much.
If you want to get some “char” on your ribs you can turn all of your grill burners on HIGH and wait until the temperature gets to around 450 degrees. Place the ribs directly on the grill for about 1 minute which will sear them. Then, bring the temperature down to LOW. You can leave them on a few more minutes at LOW and then wrap them in aluminum foil and finish them off via LOW and SLOW on your gas grill.
If you “screwed the pooch” and you need to shorten the cooking time, wrap the ribs in aluminum foil. Then, set them away from direct flames on a gas grill and set the temperature at the LOW setting. I can’t emphasize this enough. “Low and slow” applies to the grill as well as the smoker or you risk flare-ups and charring your meat. I went a notch above low once and left for less than 10 minutes and it was “charcoal city”. Only turn on 2 of the 4 burners so you have some “flame-free” zones. If the meat is really close to being completed you can set them on the upper level “cooling rack” inside your gas grill. Using the gas grill as a finisher can give your meat a nice charred taste and texture if you had a hard time achieving or “maintaining heat” in the smoker. Remove the foil and check for doneness. If tough, re-wrap them and cook them a bit longer. DO NOT leave your meat during this finishing stage or you may “screw the pooch”.
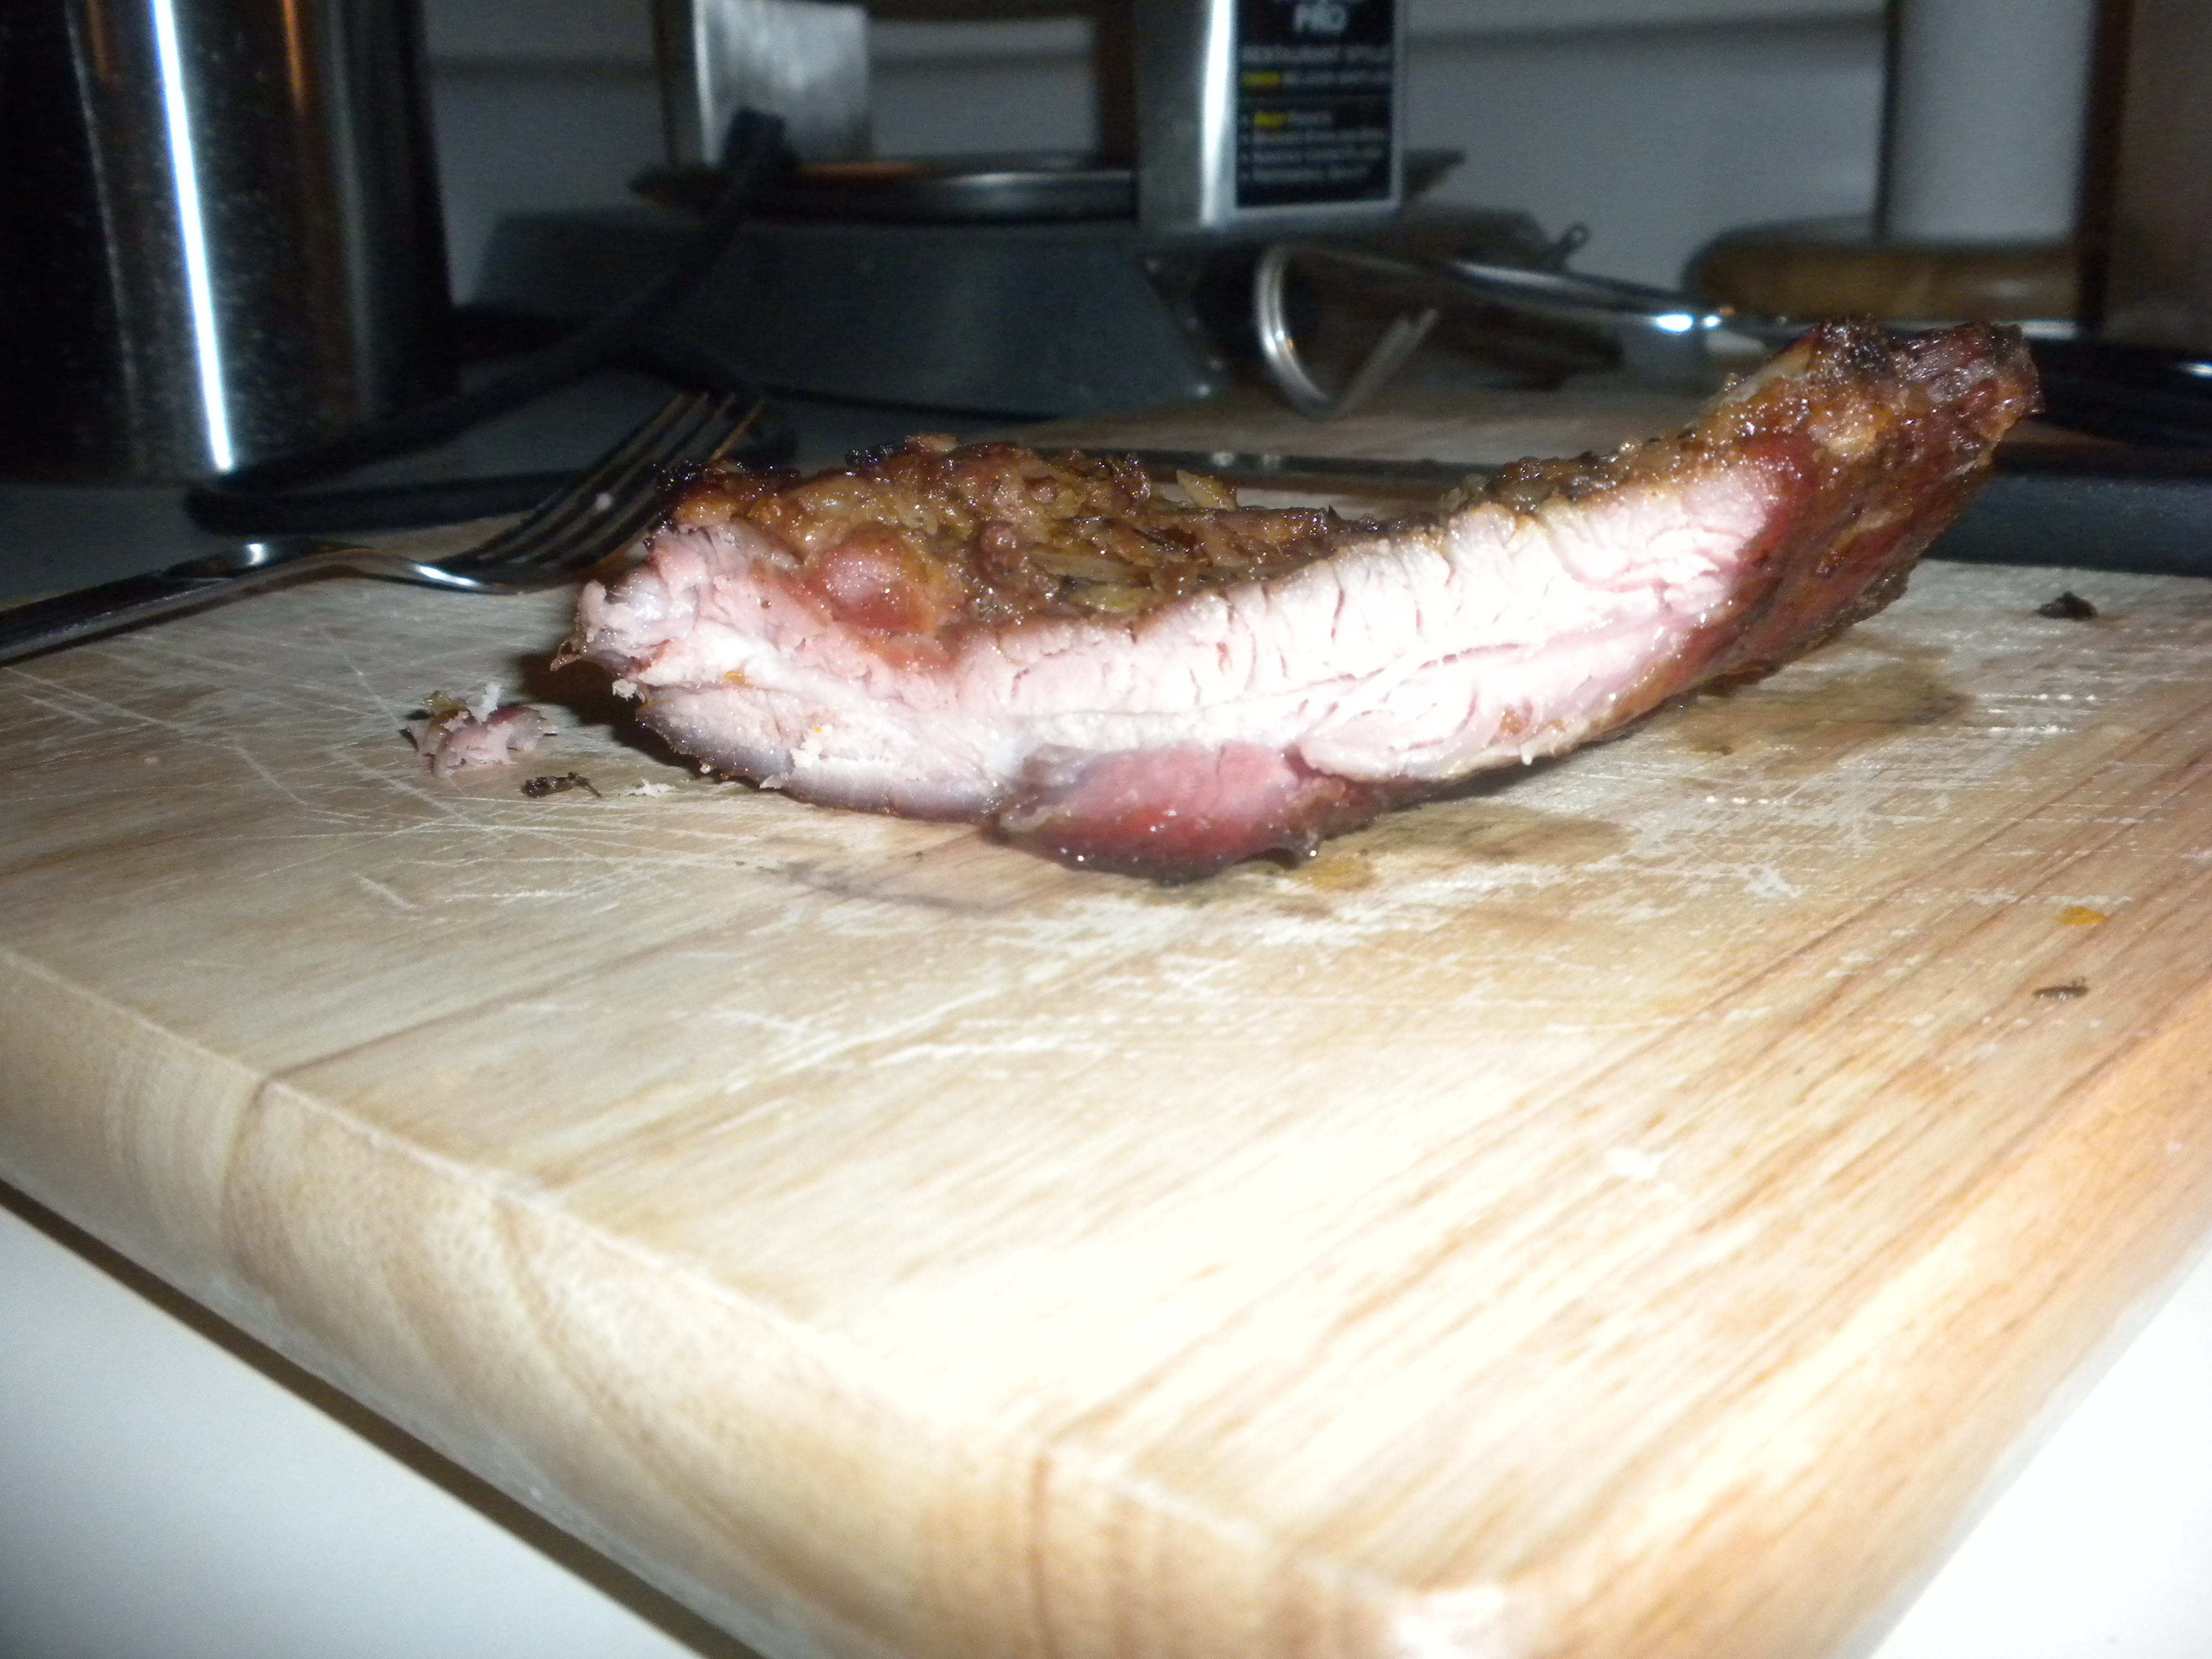
When meat begins to pull away from the bone use your digital meat thermometer (or any probe thermometer) and check the meat between the bones. Ideally you want to pull the meat off just before it reaches “fall off the bone” status. 180 F is the magic number and will leave the ribs at the “almost” fall-off-the-bone state. Make sure you use your digital thermometer in various areas (ends and middle of multiple ribs) to insure that the meat is done throughout.
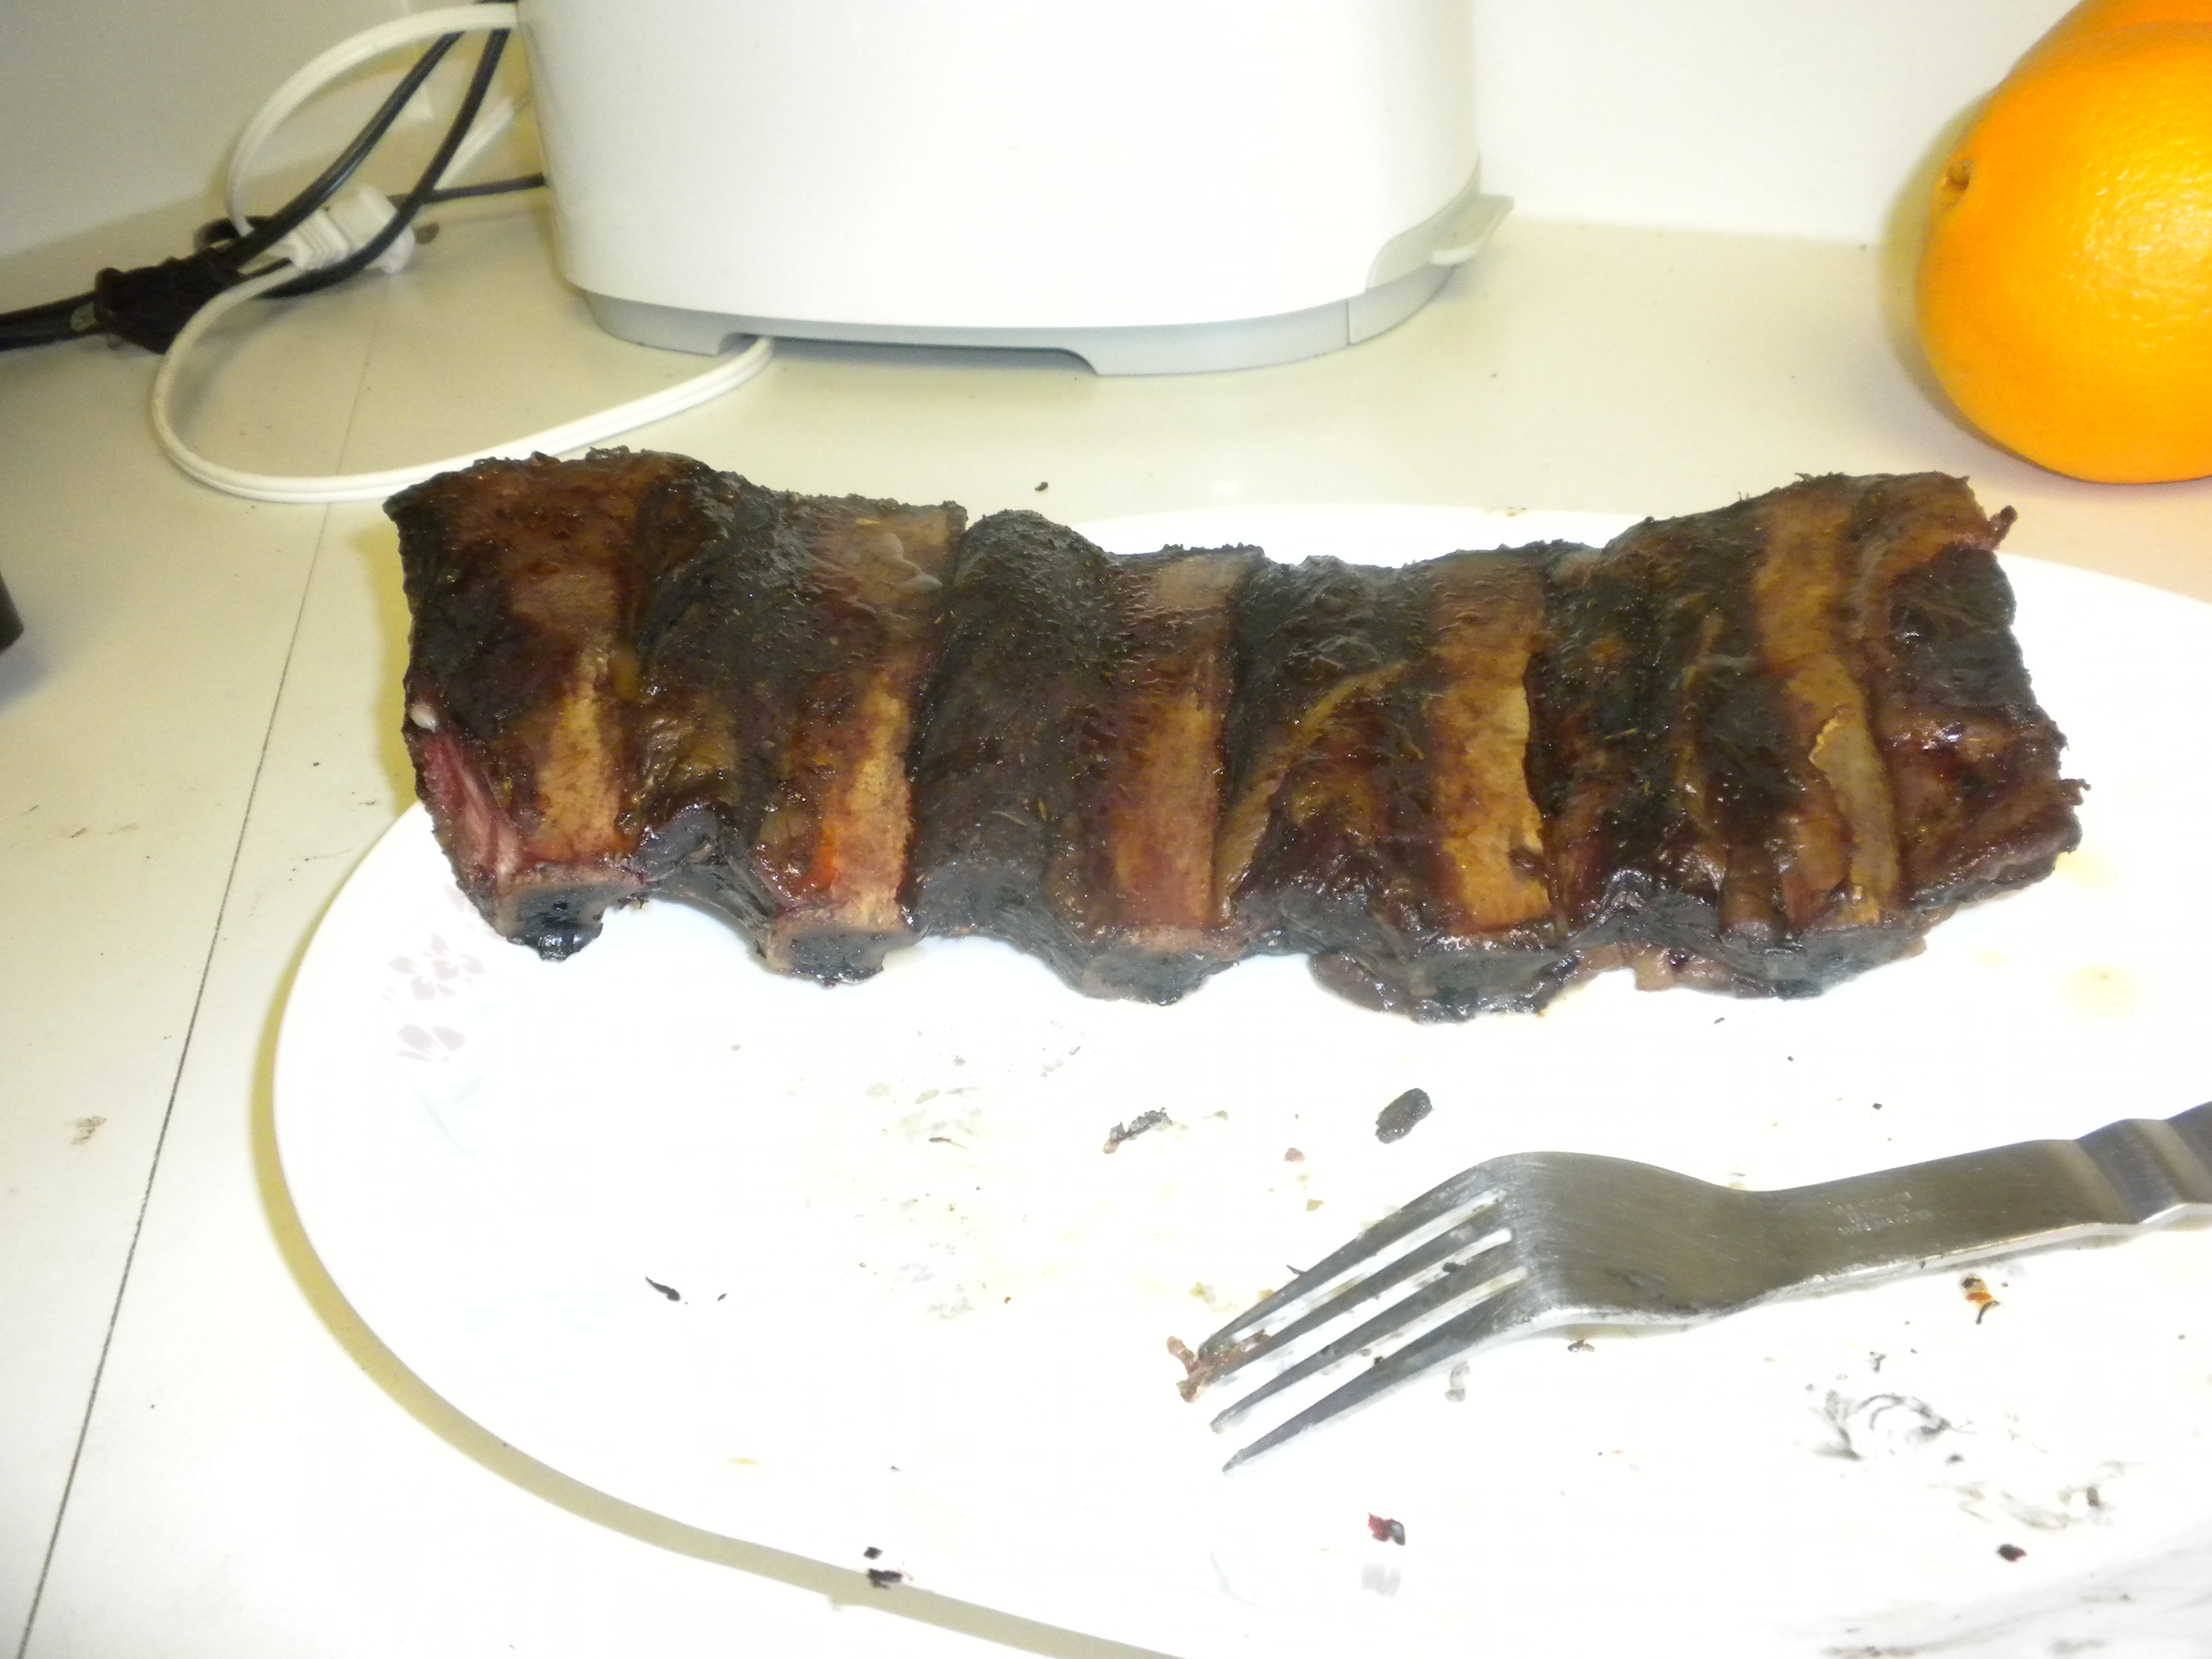
Rack of Beef Ribs on Plate
ALWAYS allow your meat to REST (for 10-15 minutes) before eating. You can tell these beef ribs aren’t as moist looking as the pork ribs. Again, beef is tougher to work with and you will need to try some of the tricks I’ve mentioned in order to help insure you end up with a more moist beef rib.
An executive chef I took a BBQ class with had an effective method for smoking without a smoker. He used a large turkey pan and a small rectangular smoker box. He placed the ribs in the turkey pan with 1 or 2 of these smoker boxes (filled with dry wood chips) and covered the pan with “commercial grade plastic wrap” and then placed it on a gas grill. You then cook “low and slow” @ 250 F for 3 hours. Next cook them on LOW in the pan with commercial plastic wrap covering but remove the wood chips (you will need a TOOL or SPECIAL GLOVE to remove that hot box…see below). You may want to buy a pair of “The Pitt Mitt” gloves which allow you to briefly touch (approximately 1 minute or less) something heated up to 1000 degree F such as your smoker box. NOTE: If you get the gloves WET, they will not prevent the heat from reaching your hand. I watched the chef touch the grate of a very hot grill for one minute before he started to get uncomfortable. Finally, caramelize the ribs for 1 minute via HIGH heat on the grill and then finish them off on LOW with indirect heat (place meat in area where a burner is turned off) until done.
When educating yourself regarding beef online remember that you should likely seek out the advice of Texans who are known for their amazing beef brisket and beef ribs.
Topic: Pork Ribs (St. Louis or Baby Back)
“Smoked” Baby Back Ribs
Shopping PORK:
Brand of Smoker: Brinkmann “Smoke n’ Grill” (vertical capsule-style). This is a cost-cutter smoker with definite limitations and as a result you will have to work very hard in order to try and produce delicious smoked ribs. The main problems are that it is constructed of thin metal and does not have an airtight seal. Thus, the temperature inside will fluctuate as air comes in and out of the smoker.
An executive chef whose BBQ class I attended informed me that I was right stating that with the cost-cutter smoker you should smoke your ribs for 2-3 hours. I would hit them with a spray bottle of wet room temperature mop occasionally to insure they don’t dry out during the smoking. Then, sear the ribs by turning the gas grill on HIGH and letting it get going. Place the ribs on for about 1 minute before turning the heat down to LOW. Stay with the ribs until they are done, checking them with your thermometer periodically.
St. Louis ribs (or similarly “spare ribs”) are better ribs for smoking due to having more meat. Baby back ribs are lean and thus are a less desirable pork option for smoking.
Purchase a digital meat thermometer or analog probe thermometer for checking the doneness of the meat.
Pick your wood chips (see wood chip chart at bottom of article).
I can fit one (1) whole rack of ribs on each rack. You can have the butcher cut it into two (2) half racks. My next purchase will be “vertical rib racks” (available at Lowe’s or Home Depot) so I can smoke more meat and allow the heat and smoke to get to the meat better. I’ve heard that Whole Foods carries hollow tubes so you can roll ribs on them and prop them up vertically. Although I’ve yet to check these out.
My friend Craigie (fellow smoker) who makes “kick ass” ribs recommends using a mix of cherry wood, apple wood, maple wood and alder wood on pork.
Buy the best spices you can afford and avoid old spices or $1.00 spices.
NOTE: Have the butcher remove the “tough” membrane for you. Otherwise you will end up pulling your hair out or stabbing yourself with a dull butter knife or screwdriver. It must be removed or it will inhibit the smoke and spice from reaching the meat.
I highly recommend using Kingsford Original Charcoal with Kingsford “Odorless” Charcoal Lighter Fluid. Or, use “lump charcoal” which is even better but adds another level of difficulty to the process. The Kingsford Original Charcoal combined with Kingsford Odorless Charcoal Lighter Fluid is undeniably MUCH improved from the nasty chemical taste left on the meat if you were to use “Kingsford Match Light” charcoal. Lump charcoal does supposedly burn hotter than briquettes so bear that in mind. Read more online as there are defenders on both sides of the fence in regards to coal.
Pork ribs are easily available fresh so buy fresh. Your local butcher shop is a good bet if you have any issues. Always buy the best quality meat you can afford since nobody wants to spend 8+ hours doing anything and have a subpar result. Costco isn’t a bad choice for buying meat.
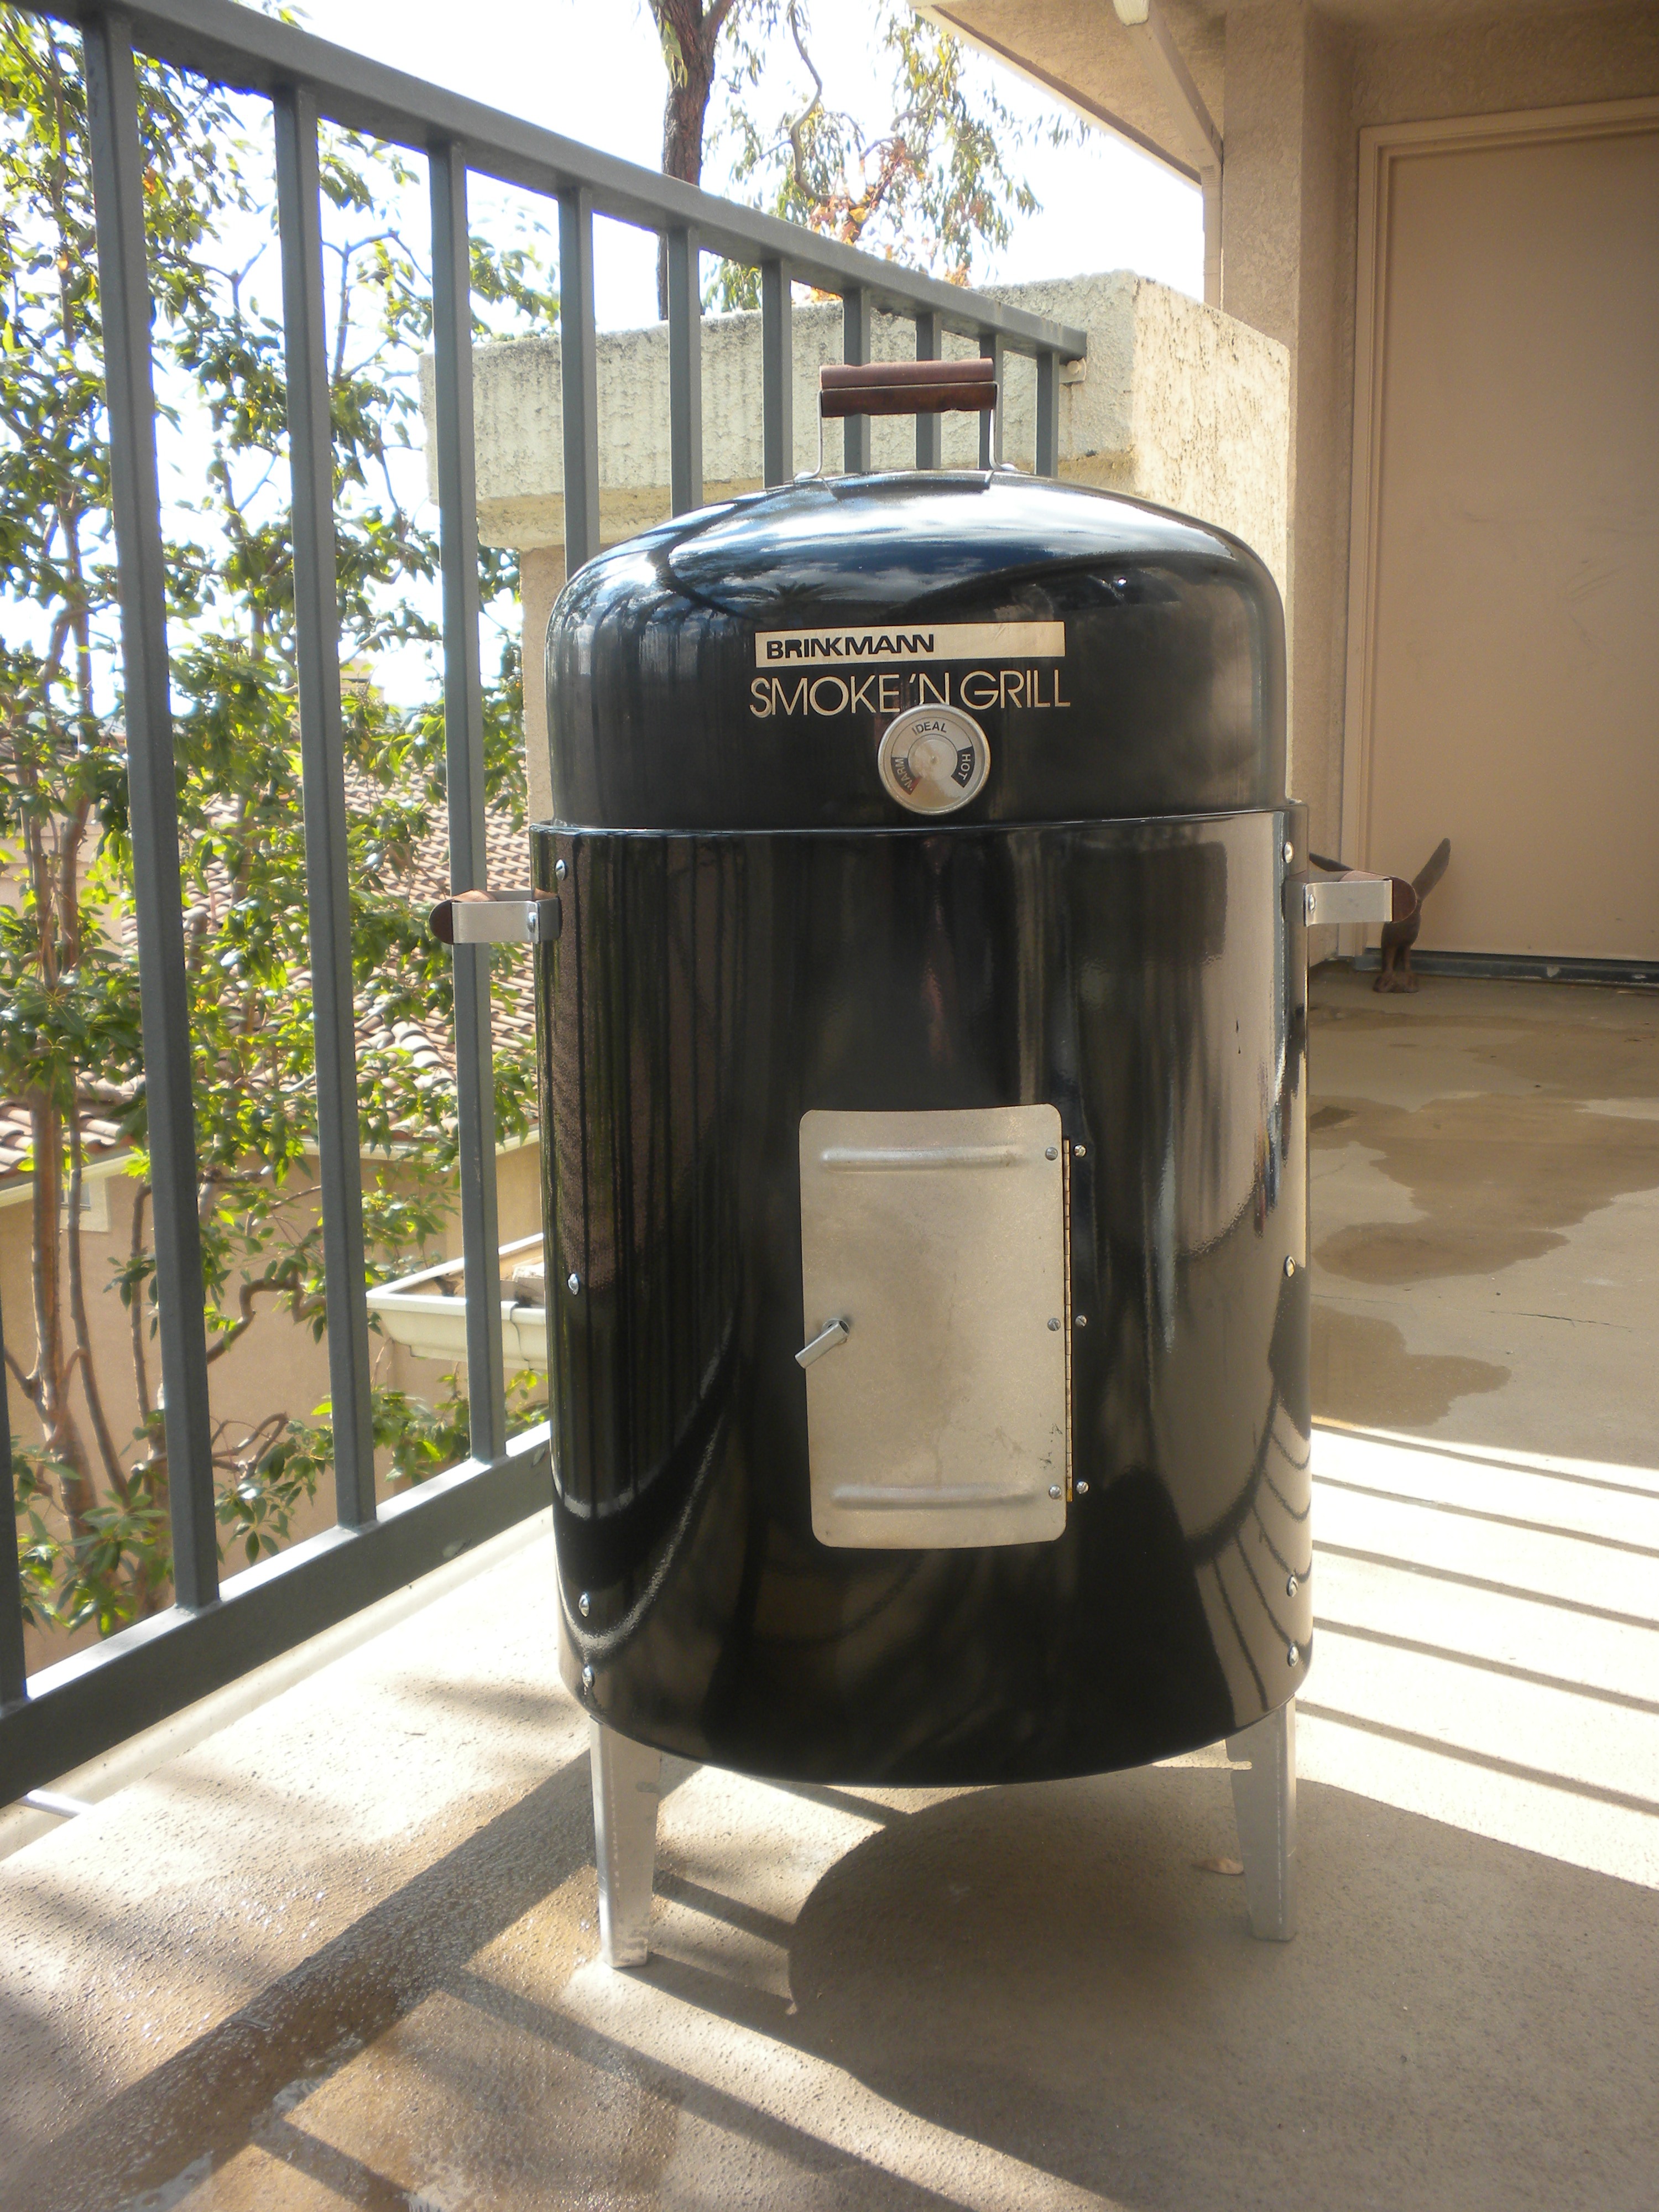
Brinkmann Smoker
Prepping PORK:
Soak 3-5 cups of wood chips for about one hour. Drain them and place them directly on the coals when the smoker has reached temperature. Too much smoke = bitterness! I add wood chips about 4-6 times throughout the smoking process. Quickly open the barn door and toss wood chips onto the coals.
Rinse ribs in water prior to seasoning and pat dry with a paper towel.
If there is a lot of excess fat, remove some now.
If you opt for a “dry rub”, lay down a piece of foil on a cutting board for seasoning your ribs.
For a “dry rub” (sauce-free) use Emeril’s “essence” rub + sea salt + brown sugar. A good start (depends on tastes) might be ¼ cup of Emeril’s rub, 1/8 cup of sea salt, ¼ cup of brown sugar.
Another nice rub is “Simmie J’s Hickory Flavor Gourmet Seasoning and Rub”. Sprinkle sea salt lightly on both sides of the ribs as well as this spice is a touch low on salt. Be careful not to over-salt or over-spice your meat as it will dry it out. Do be sure to get the rub on both sides. If you use a dry rub you will need to have something like 7-Up soda to brush on during cooking to help insure the meat stays moist.
If you have the time, return the ribs to the fridge in an airtight container (with rub on them) for up to 24 hours.
Allow the meat to be out of the fridge 1 hour prior to cooking.
Prep should take about 1 hour including allowing meat to get to room temperature. This will help shorten the “on the grill” time.
NOTE: For the BOTTOM rack you need to have the meat resting on foil and on top of a cutting board. To re-insert the bottom rack you have to circumnavigate the side brackets. As a result, your only option is to set the meat on the rack only after you have re-inserted it on top of the brackets. Again, it is crucial that precious heat isn’t lost getting the — “meat on the heat”.
Smoking PORK:
NOTE: The most difficult part of smoking is “achieving and maintaining” heat.
Ideally you want to smoke when the weather is on the cooler side since there will be more humidity and thus more moisture is brought to the meat.
Don’t use wine in the water pan for pork ribs.
My smoker is the Brinkmann “Smoke N’ Grill” (capsule-style) which has a thermometer with a Low, IDEAL and High readout on it. I tried to get it as close to ideal and maintain it as best as I could. Maintaining heat is one of the biggest challenges to “smoking” and that is especially true when utilizing “cost-cutter smokers”. You may need to visit smoking-meat.com for their article “Problems with the ECB and How to Fix Them” which will assist you in modifying your cost-cutter smoker. I drilled holes into my charcoal pan and inserted a REAL (with numbers) temperature gauge so I could more accurately monitor the cooking temperature.
1 ounce of lighter fluid per pound of charcoal is recommended but my experience is it takes noticeably more fluid than that. Spray it liberally on the coals, light and wait for them to take on more of a gray hue. I do wonder if “over saucing” the coals will lead to them turning to powder sooner than later but it is necessary to build a good fire. Don’t pack the briquettes too tightly. Remember air must be able to circulate between them.
Build a very large pyramid of coals (covering the bottom) in the pan at the bottom of the smoker.
Add more coals throughout the smoking process in order to maintain or elevate heat. I add approximately 7-8 coals every hour or so.
Have a bright flashlight (ex. Maglite) handy for peering in at the meat and checking the level of liquid in the water pan.
Use a squeezable sports water bottle with nozzle (ex. Arrowhead) so you can spray liquid into the water pan at an awkward angle during the smoking process.
Baby back ribs typically require 45 minutes to 1 hour per pound of ribs.
If you have both racks (upper and lower) filled with ribs you can expect it to take between 6-8 hours. Check the lower rack meat first for doneness using your digital meat thermometer.
Open the “barn door” on the side of your smoker as little as possible or heat will be lost.
To shorten the cooking time, wrap (otherwise juices will “fly out”) the ribs in aluminum foil after a couple hours of smoking. Then, place them back in the smoker OR set them away from direct flames on a gas grill and set the temperature at the LOW setting. Only turn on 2 of the 4 burners so you have “flame-free” zones. If the meat is close to being done you can set them on the upper “cooling rack” inside the gas grill. Using the gas grill as a finisher can give your meat a nice charred taste and texture if you were unable to achieve it while “blowing smoke”.
Check the temperature at 20 minutes once you’ve “achieved heat” and again at 1 hour in. With a cost-cutter smoker you will need to check your meat at least every 45 minutes once heat has been achieved.
NOTE: You must have the TOP rack lined with foil and meat resting on the rack before lighting the charcoal. For the BOTTOM rack you need to have the meat resting on foil and on top of a cutting board. To re-insert the bottom rack you have to circumnavigate the side brackets. As a result, your only option is to set the meat on the rack only after you have re-inserted it on top of the brackets. Again, it is crucial that precious heat isn’t lost getting the — “meat on the heat”.
Pull the ribs before they “fall off the bone” so all moisture isn’t lost.
“Hot smoking” occurs within a temperature range of 165 F – 185 F. If it gets hotter than that the foods will shrink excessively, buckle or split. Moisture & fat will be “cooked away”.
Place the ribs bone side down on the racks.
NOTE: Never allow the water pan to run low or run out of water and use warm or HOT liquids to avoid wasting fuel. Use a sports water bottle with nozzle for occasional refills of the water pan.
If your smoker doesn’t have a built-in thermometer which displays numbers you will soon feel as if — “you were screwed at the drive-thru”. You can set a Taylor oven thermometer directly on the racks but with how many times you will need to check it you will lose way too much precious heat and your finished product will suffer BIG TIME.
“Low” and “slow” on temperature and time is KEY!
NOTE: The “danger zone” is the temperature range between 40 F – 140F. When uncured meat remains in this zone for more than 2 hours the growth of bacteria increases to a dangerous level. Also, smoking meat robs the environment of oxygen which when combined with the “danger zone” increases odds of botulism.
Add “moist” wood chips to the coals prior to placing the meat on. Also, you may add them periodically throughout the process. However, don’t go overboard or the meat might get bitter and nasty.
Use long tongs for moving the meat (if you must) but know that the more you move the meat the more juices that might be lost.
If you want to get some “char” on your ribs you can turn all of your grill burners on HIGH and wait until the temperature gets to around 450 degrees. Then bring the temperature down to LOW and add your ribs directly onto the grill (NO foil). Let them set for a few minutes before wrapping them in foil (see below).
To shorten the cooking time, wrap (otherwise juices will “fly out”) the ribs in aluminum foil after 2 hours of smoking. Then, place them back in the smoker OR set them away from direct flames on a gas grill and set the temperature at the HIGH setting. This will sear them/caramelize them. Then adjust to a LOW setting. Only turn on 2 of the 4 burners so you have some “flame-free” zones. If the meat is really close to being completed you can set them on the upper level “cooling rack” inside your grill. Using the gas grill as a finisher can give your meat a nice charred taste and texture if you had a hard time “achieving or maintaining” heat in the smoker. Remove the foil and check for doneness. If tough, re-wrap them and cook them a bit longer.
Near the end of the smoking/cooking process, some pros wrap them in foil and add a little butter on top and a little Coca-Cola underneath.
When meat begins to pull away from the bone use your digital meat thermometer and check the meat between the bones. 190 F – 200 F is the desired finished temperature of the meat for baby back pork ribs.
ALWAYS allow your meat to REST (for 10-15 minutes) before eating.
An executive chef I took a BBQ class with had an effective method for smoking without a smoker. He used a large turkey pan and a small rectangular smoker box. He placed the ribs in the turkey pan with 1 or 2 smoker boxes (filled with dry wood chips) and covered the pan with “commercial grade plastic wrap” and then placed it on the gas grill. You can cook LOW and SLOW @ 250 F for 3 hours. Next cook them on LOW in the pan with commercial plastic wrap covering but remove the wood chips (you will need a TOOL or SPECIAL GLOVE to remove that box…see below). You may want to buy a pair of “The Pitt Mitt” gloves which allow you to briefly touch (1 minute or less) something heated up to 1000 degree F such as your smoker box. NOTE: If you get the gloves WET, they will not prevent the heat from reaching your hand. I watched the chef touch the grate of a very hot grill for one minute before he started to get uncomfortable. Finally, caramelize it for 1 minute via HIGH heat on the grill and then finish them off on LOW with indirect heat (place meat in area where a burner is turned off) until done.
When educating yourself reading online remember that Memphis BBQ reigns supreme on pork. Thus, you would serve yourself best by picking the brains of the peeps from Memphis, TN. Johnny Trigg is known as “The Godfather of Spare Ribs”. Also, he has won a Kingsford Invitational on his pork shoulder.
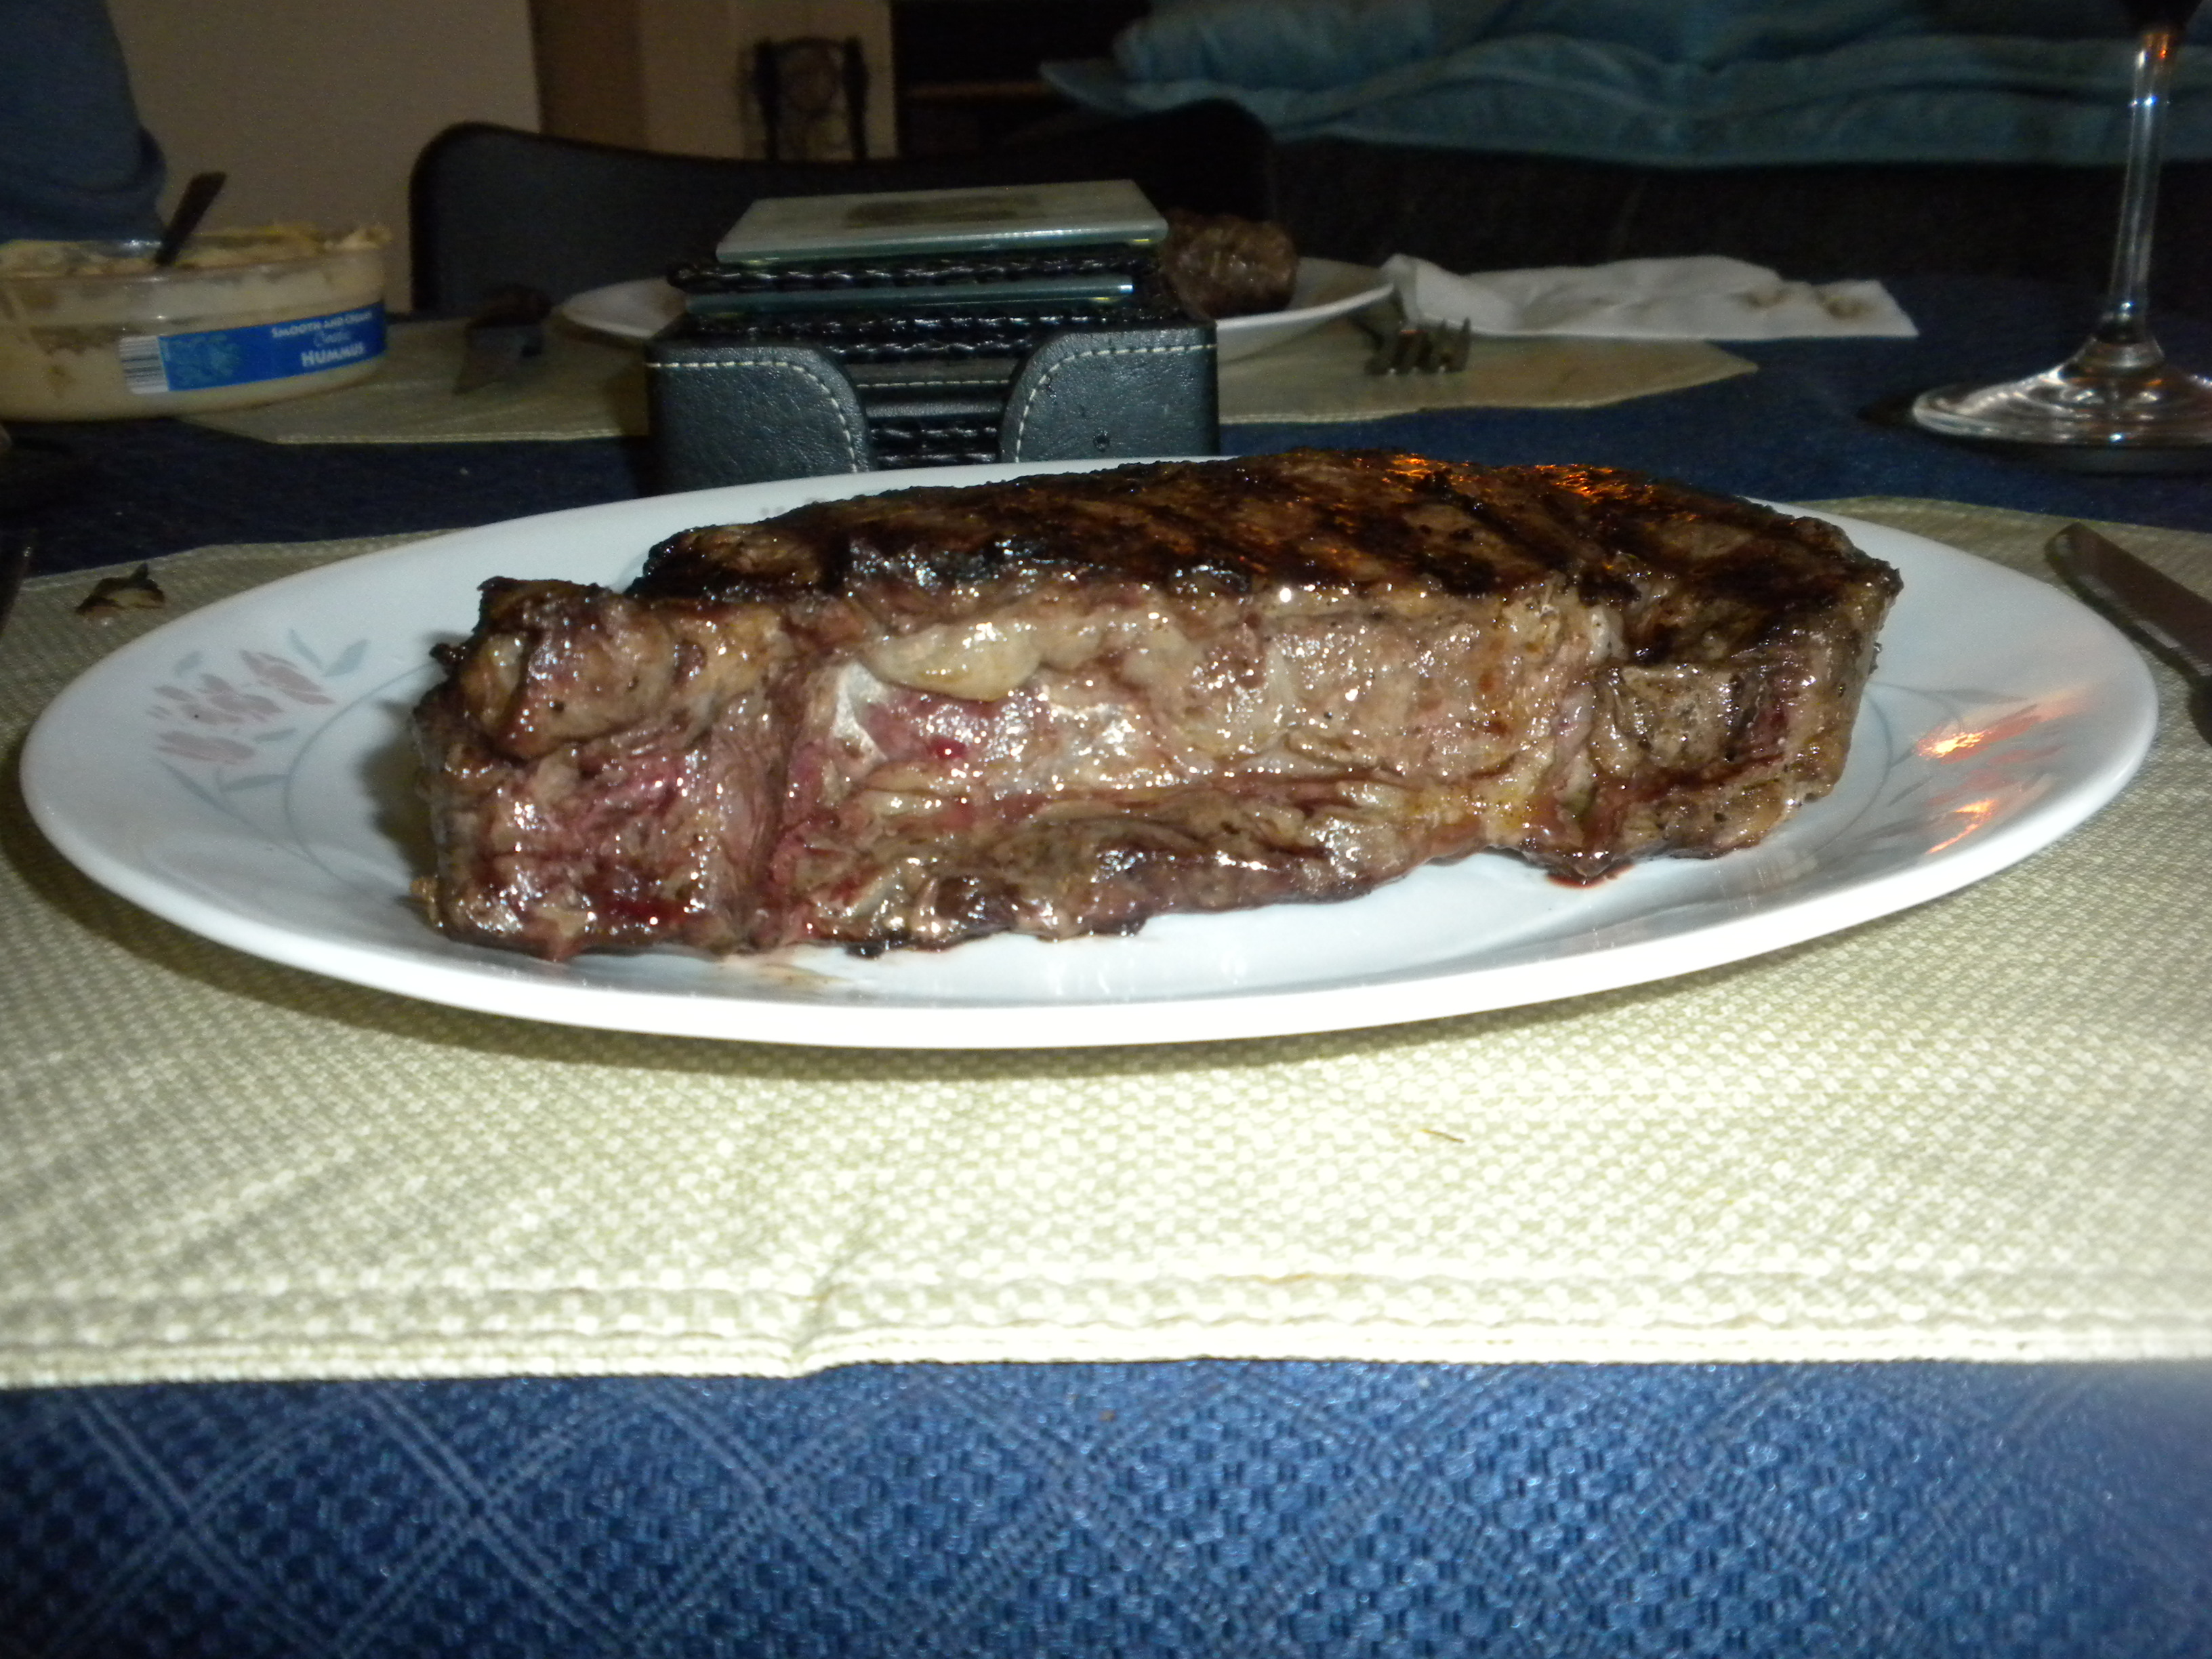
Finished Rib-eye
This rib-eye wasn’t “smoked” but it turned out so delicious I had to include the photo of it. In the future I will cook one on my gas grill with a smoke box full of wood chips next to it.
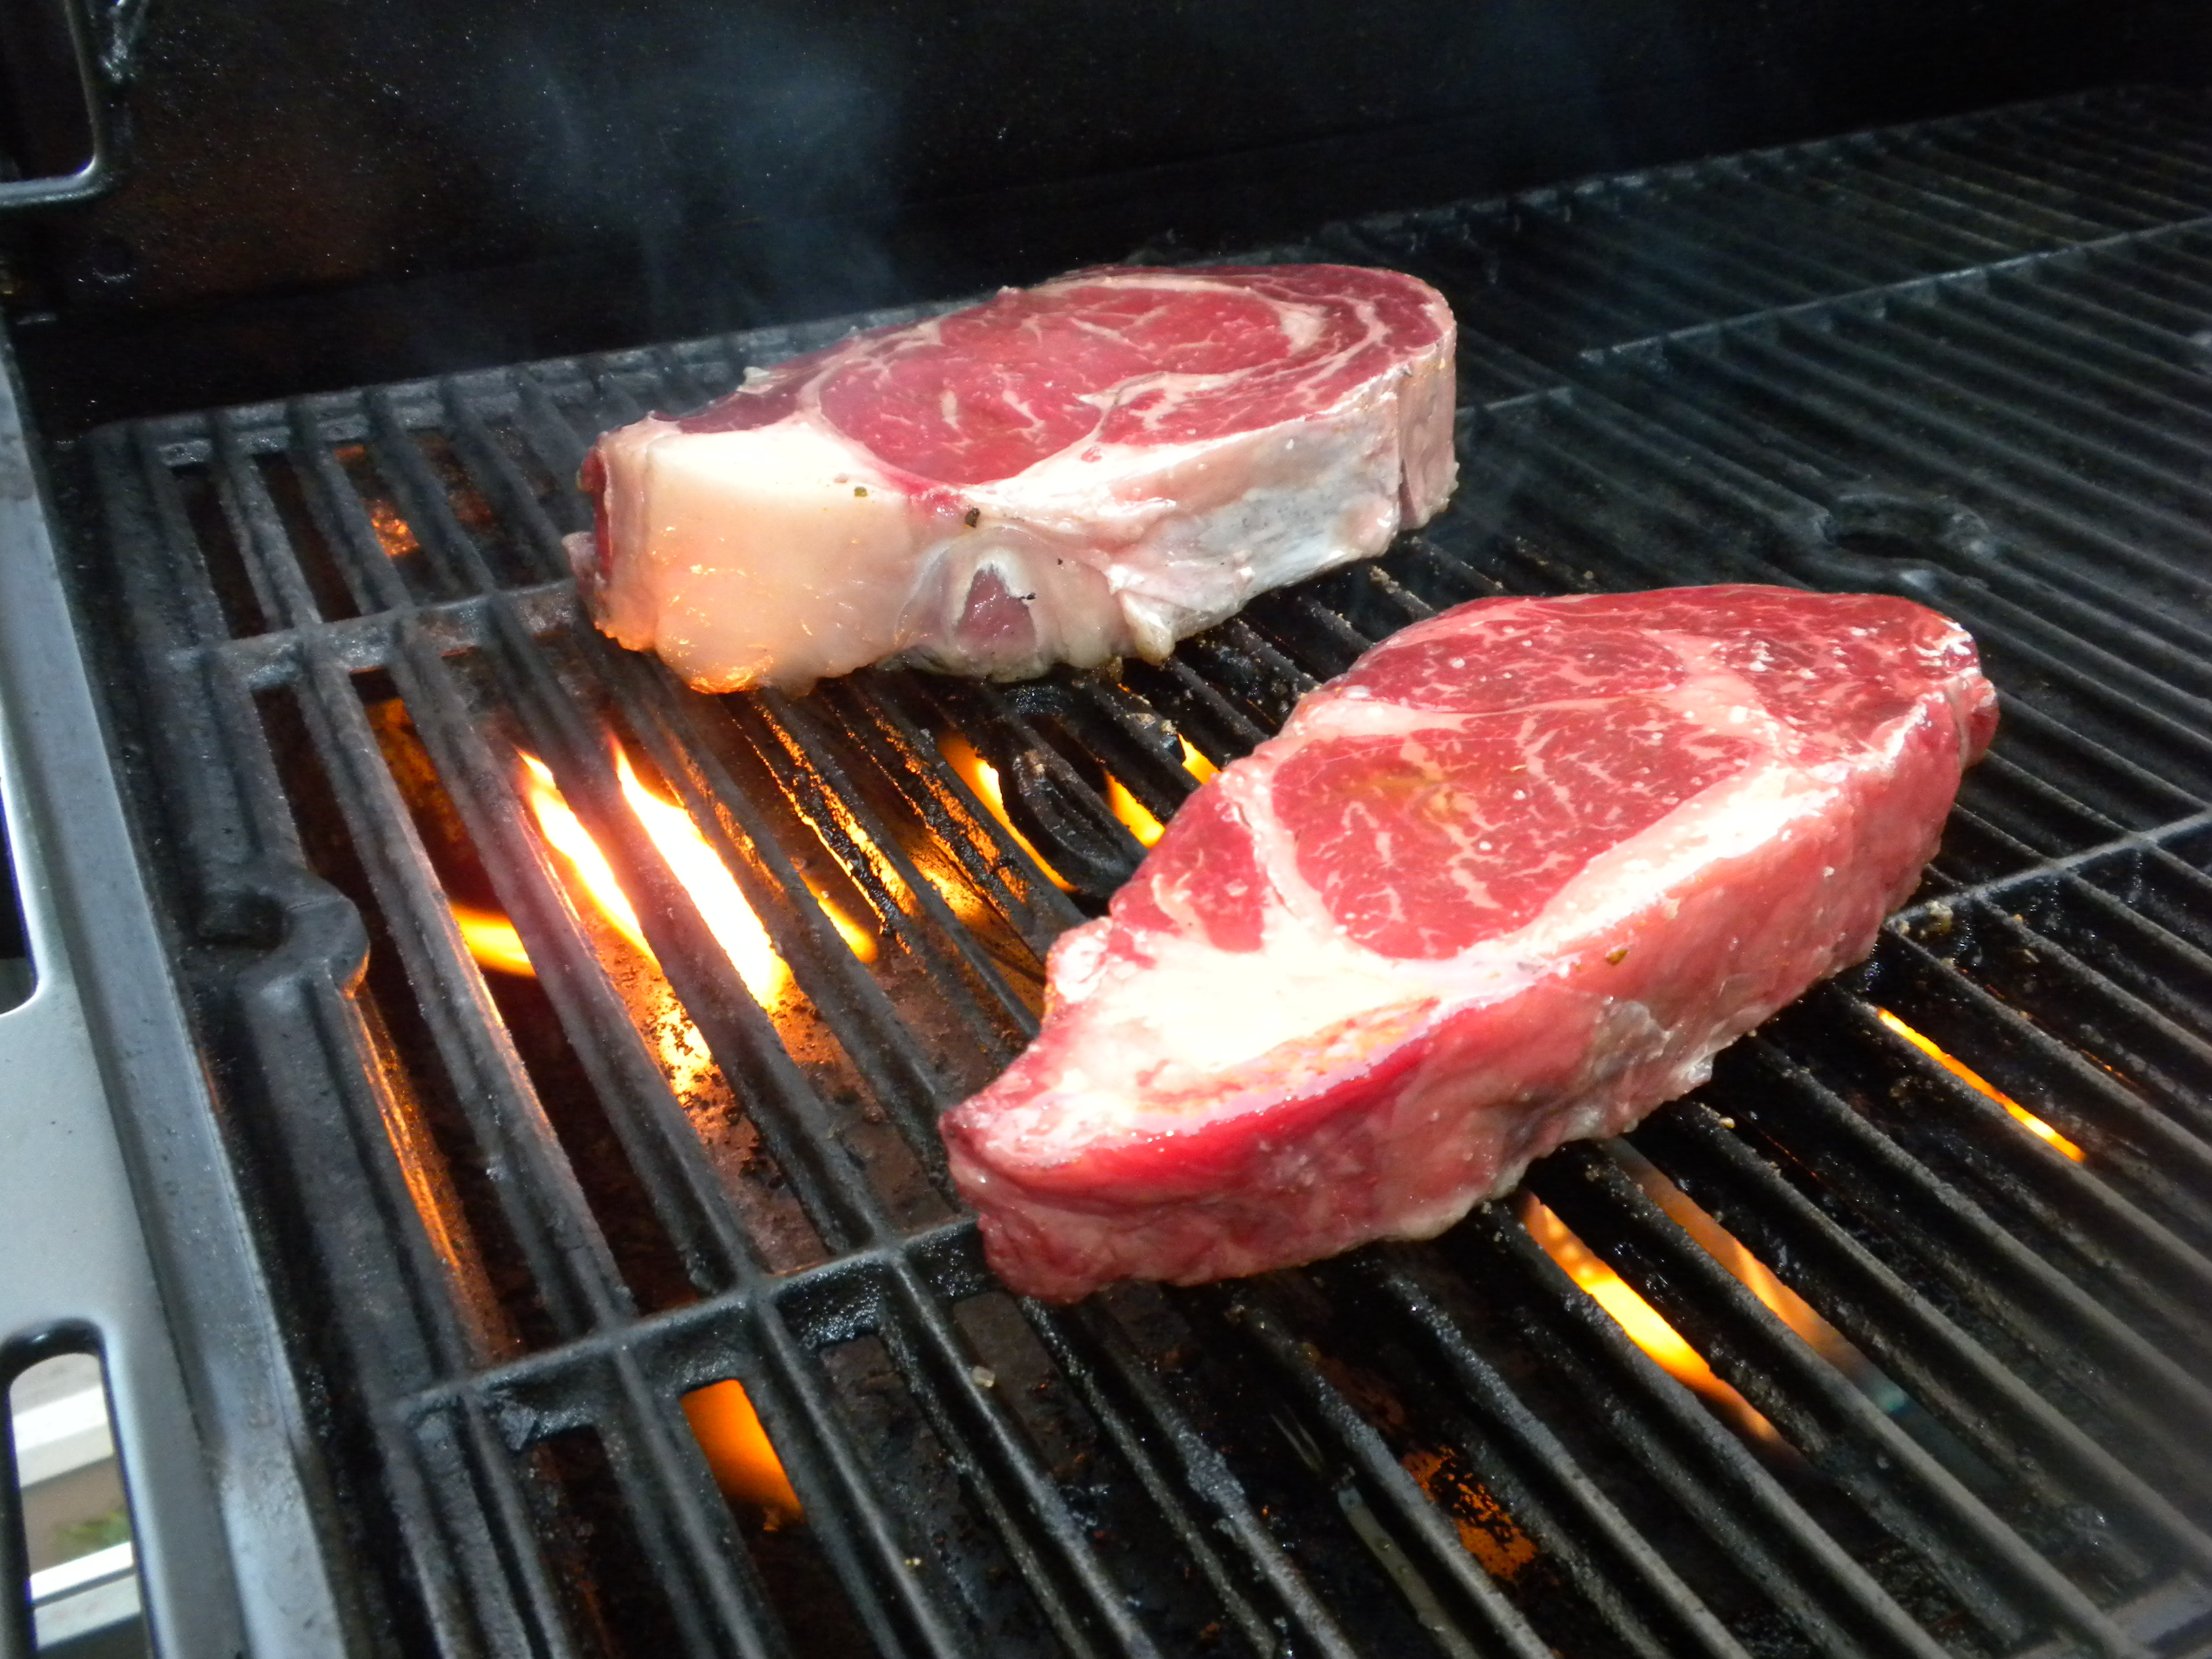
Prime Rib-eye
This was the “before” photo and I can assure you that meat is as pricey as it looks.
Wood Chips Chart:
Alder = fish, poultry, pork
Apple Wood = beef, poultry, salmon & fatty fish, pork
Cedar = fish, turkey
Cherry Wood = mixing wood, beef, pork
Hickory = all meats, ribs
Jack Daniels (oak) = beef, pork, poultry and game
Maple = mixing wood
Mesquite = (more delicate than hickory), most meats, beef is especially good
Oak = red meat, fish, pork, “the purists choice” for beef and beyond
Pecan = fish or mixing
Dry Rubs:
John Henry’s “Ole Bob’s Hickory with Garlic” Rub smells amazing but I have yet to use it. John Henry’s “Mesquite Rub” also has a nice sniff. “Butt Rub” is very salty and the smell wasn’t as nice as John Henry’s. Barbecues Galore stores (best selection I’ve seen) and Lowe’s have a nice selection of dry rubs.
Beef Brisket:
Brisket is the “Holy Grail” of meat for West Coast smokers. I have yet to take on this demon as it tends to get very dry if none done to perfection. It is a very “high maintenance” meat in that you must do EVERYTHING right. There are only two outcomes with brisket…you end up with something your friends talk about for days OR you end up with something you would only feed to your dog (on a day you were pissed at him/her).
The executive chef I met in a BBQ class told me that the key is to “brine” the brisket. If he were to tackle it with my cost-cutter smoker he would smoke it for 4-5 hours at 210-220 degrees F. Then, he would move it to the oven in a turkey pan with commercial plastic wrap until done. NOTE: If you INJECT your brisket it will change the texture due to the “inflating” aspect of injecting. This is why many pros refuse to inject. Some pros say hit it with HIGH and FAST heat. Others say LOW and SLOW are the key.
About This Guide:
This guide or cheat sheet is a combination of many hours of hard work smoking various meats, researching and reading “how-to-smoke” websites and the trial and error method. The websites that assisted me the most included: samssmoker.com, the-greatest-barbecue-recipes.com, doubledanger.com, smoker-cooking.com and fabulousfoods.com.
Good luck — “Blowing Smoke”.
Regards,
David J. Evangelisti, II
7-28-11 (Created)
5-18-14 (Current)
